Room/Classroom/Seminar/Defense Technology
Learn about the technology, audio, and video procedures and options in different rooms at MLML.
- FAQs for Seminar and Defense Presenters
- Individual Classroom Technology Guide
- How to Use the VISIO TVs
- How to use the Neat Bar with Zoom Room
- Seminar Room Presenter's Guide
- Seminar Room Equipment Troubleshooting Guide
- Seminar Room Audio System Instructions
- Classroom iMac and Projector Instructions - Mac OS X
- Classroom iMac and Projector Video Settings
- Classroom iMac and Projector Troubleshooting Guide
- Think Tank Projector Operations
- How to use the Laser Pointer USB remote control
- How to Use the Meeting Owl Pro
- How to Use the Whiteboard Owl
- How to Use the Jabra Bluetooth Speaker for Zoom Meetings
- Meeting Owl - Quick Start Guide (Dry Classroom / Think Tank)
FAQs for Seminar and Defense Presenters
- For general information about presenting in the seminar room visit our Seminar Room Presenter's Guide
- For information about Audio setup in the Seminar room visit our Audio Instructions Page
- For information on troubleshooting issues in the Seminar room visit our Troubleshooting Page
Preparation & Set Up:
Do I need to reserve the Seminar room?
-
- If you are a MLML seminar speaker, this has been taken care of for you.
- If you are using the seminar room for another type of presentation, you will have to reserve the seminar room.
- Seminar Reservation Request Form
- Fill out the required information > Click Submit
- An email will be sent to the manager of that resource
- A confirmation email will be sent to you when request has been processed
What type of equipment is provided in the Seminar room?
-
-
-
- Epson Projector
- Connects with an HDMI cable
- HDMI to mini DisplayPort adapter available at podium
- Need a different adapter? Please contact IT Help Desk
- Connects with an HDMI cable
- MacBook
- We recommend you use our Macbook provided
- Use of personal computer allowed with the aid of IT Help Desk Staff
- Laser Pointer
- Audio Cable
- Timer
- Tables and Chairs
- Microphones
- For seminars these microphones will be set to only record voices, not to project them to the audience
- Epson Projector
-
-
How early should I arrive to setup?
-
-
-
-
-
- 30 minutes prior to your event/presentation start time.
-
-
-
-
Why is the provided computer recommended?
-
- The MLML computer is recommended because it has been calibrated with our audio, streaming, and projecting equipment. If you insist on using your own computer we strongly recommend bringing a USB with your presentation on it as a backup.
- Also allows for use of our Spotlight laser pointer, which can be seen through our capture device to those viewing virtually.
Will I be able to play audio or video during my presentation?
-
- We will test your audio and video during the 30 minute set up period before your talk begins. If you are using your own computer then we will configure the equipment to work with your presentation to the best of our abilities.
What should I save my presentation as?
-
- If you’re using PowerPoint, save your presentation as a portable PowerPoint presentation.
- If you are not using PowerPoint, we recommend that you export a copy of your presentation to PowerPoint as a backup.
How should I format my presentation?
-
- For best quality we recommend a 16:9 powerpoint presentation
- Follow this link to learn how to format a 16:9 presentation
- If presentation created in a pre-2011 version of MS Office PowerPoint, we recommend that you save your presentation as a portable PowerPoint presentation
- Doing this will ensure any links and videos embedded in your presentation will be saved and transferred over without issue.
- Save presentation on flash drive whether using our Macbook or your personal computer
- For best quality we recommend a 16:9 powerpoint presentation
What type of port do I need on my computer if I use my own?
-
- MLML has an HDMI cord that will connect your computer to our projector.
- If you do not have an HDMI port we have adapters you can use, we ask that if possible you let us know ahead of time what type you need.
Recording & Streaming:
What is the difference between MLML live streaming my talk publicly vs privately?
-
- Public streams can be viewed live on MLML’s YouTube page by the general public, and can be watched publicly on MLML’s YouTube page once the talk is over.
- Private streams are recorded as “Unlisted” on MLML’s YouTube page. This means that people can only view it who have the link. MLML provides the link to those in the MLML community who would like to watch the stream, but it is not provided publicly. It then is kept as Unlisted after the talk is over, so that it cannot be searched for or viewed on YouTube publicly.
Why do I have to be recorded?
-
- All MLML seminars and defenses are recorded for MLML internal community but the speaker has option to make the presentation stream live to the public or not. This helps our facility improve in it’s streaming capabilities and keeps our records up-to-date.
Remote Presentations:
What application is used to video-call into the seminar presentation?
-
- We use Zoom to host remote presentations. MLML will schedule a meeting through Zoom and send the link to you beforehand so you can video-conference in.
- Make sure to install and test Zoom Client for Meetings ahead of time.
Will we practice set up beforehand?
-
- Yes, MLML will schedule a practice presentation 1 week prior to your MLML presentation to work through all of the different aspects of the video-conference and audio/video configuration.
- You will receive one email two weeks before your presentation to setup this practice presentation, so keep an eye out for that.
When should I call into the meeting the day of my presentation?
-
- Please call into the meeting 60 minutes ahead of your presentation’s start time. Please provide your cell phone number as well so we can easily communicate for set up the day of your presentation.
How do I join the Zoom meeting?
-
- Follow the Zoom meeting link we send via email, or manually enter the Zoom Meeting ID # from our email on your Zoom application under “Join Meeting”
- Join the Zoom meeting “with video”, then join “Computer Audio”
- Share your Desktop and start your slide show with first slide showing
Individual Classroom Technology Guide
Adapters and cables can be checked out from the IT Help Desk in order to connect a personal laptop to a projector, computer, or Mobile Presentation Unit (MPU) in any of Classrooms.
Dry Classroom (109):
- An NEC projector is available facing the screen wall, and is powered on with a white NEC remote located on the podium.
- Personal computers connect to the projector via an HDMI cord available at the podium.
- There is an HDMI cable connected to the wall port. You can connect via HDMI or the two attached adapters (USB-C and Mini DisplayPort). Please contact the IT Help Desk if you need a different adapter.
- The speakers on the wall are connected to the projector. When you plug your computer into the HDMI cable, it will switch to using the speakers. You can control the volume using the projector remote.
- A VISIO TV is also available on the opposite wall, and is powered on by pressing and holding the power button located on the back in the bottom left corner, or with a remote checked out from the IT Help Desk.
- To change the input of the TV, press the power button repeatedly to cycle through input menu options, or using the input button on the checked out VISIO remote.
- The TV can be used with a personal laptop via an HDMI connection. The port for the HDMI cable is located on the wall directly below the TV. You can connect via HDMI or the two attached adapters (USB-C and Mini DisplayPort). Please contact the IT Help Desk if you need a different adapter.
- The TV is also connected to and can be used with a Mac Mini. A designated mouse and keyboard for the Mac Mini are stored under the TV.
- The TV is also a touchscreen, which will only work when connected to the Mac mini.
- The TV’s speakers will only work with a personal laptop when the computer is connected via HDMI port. Volume must be adjusted on the TV with the VISIO remote, not on the user’s computer.
- A Jabra Bluetooth microphone/speaker is available at the IT Help Desk for remote or hybrid classes.
- For instructions on how to use the microphone/speaker, click here.
Group Study Room (103):
- One projector is available for use, facing the screen in the back corner.
- The projector is only accessible via personal computer, which connects with an HDMI cord in either of two available wall ports - one next to the screen, one on the back wall.
- Only one port may be used at a time.
- A Cisco Mobile Presentation Unit (MPU) is available for use.
Seminar Room (101):
- One projector is available for use in the seminar room through a MacBook located on the podium:
- An Epson projector facing the screen
- Turn it on with an Epson remote pointed from the podium (it could take a while to warm up once powered on).
- Connect with an HDMI cable (with HDMI to mini DisplayPort adapter) plugged in to the left port on the podium.
- The NBC projector facing the sidewall is unavailable.
- An Epson projector facing the screen
- A MacBook Air connected to the main projector is located on the podium and should be powered on or woken up.
- **Use of a personal computer instead of the MacBook is allowed with the aid of IT Help Desk staff for proper setup and adapters.**
- If you are using your personal computer, please place it on top of the closed MacBook. Do not move the MacBook or unplug its power cable.
- An audio cable protrudes from the podium for audio connection on the side of the MacBook.
- A Jabra Bluetooth microphone/speaker is available at the IT Help Desk for remote or hybrid classes.
- For instructions on how to use the microphone/speaker, click here.
- Audio is enabled and controlled with an amp from the A/V control room located in the back of the seminar room. The A/V room can also be used to stream and record presentations.
- **This room is kept locked, and requires assistance from the IT Help Desk staff for entry.
Student Conference Room (414):
- Do not enter. The Student Conference Room is currently unavailable for use. It is undergoing maintenance. Future re-opening status: TBD
- A single Epson projector is available for use, facing the screen.
- The projector can be used only with a personal laptop via VGA connection.
- **Currently, use of this projector requires setup assistance from IT Help Desk staff. Please submit an IT Helpdesk Ticket if you wish to use the projector.**
- A Cisco Mobile Presentation Unit (MPU) is available for use.
Think Tank (202):
- Two Epson projectors are available for use with a personal computer, both facing the opposite wall of the TV.
- An HDMI wall port is located underneath each Epson projector for connection via an HDMI cord.
- Projector 1 must be turned on manually. Projector 2 can be turned on with either the grey Epson remote, or manually.
- Volume level must be adjusted with the remote
- A VISIO TV is also available on the opposite wall, and is powered on by pressing the power button located on the back in the bottom left corner, or with a remote checked out from the IT Help Desk.
- To change the input of the TV, press the input button near the power button, or using the input button on the checked out VISIO remote.
- The TV can be used with a personal laptop via an HDMI connection. There is an HDMI cable connected to the wall port. You can connect via HDMI or the two attached adapters (USB-C and Mini DisplayPort). Please contact the IT Help Desk if you need a different adapter.
- The TV is also connected to and can be used with a Mac Mini. A designated mouse and keyboard for the Mac Mini is located in a basket beneath the VISIO TV .
- The TV is also a touchscreen, which will only work when connected to the Mac mini.
- The TV’s speakers will only work with a personal laptop when the computer is connected via HDMI port. Volume must be adjusted on the TV with the VISIO remote, not on the user’s computer.
- Wireless connectors are available for use with the TV and have components that plug into the back of the TV as well as the USB port on your personal computer.
- A conference phone is available and it connects to the front wall port.
- A Jabra Bluetooth microphone/speaker is available at the IT Help Desk for remote or hybrid classes.
- For instructions on how to use the microphone/speaker, click here.
Oceanography Classroom (214):
- An NEC projector is available in the Oceanography Classroom. It is hung from the center of the room, facing the screen, and is powered on with a white NEC remote.
- The projector is accessible via HDMI. There is an HDMI cable connected to the wall port. You can connect via HDMI or the two attached adapters (USB-C and Mini DisplayPort). Please contact the IT Help Desk if you need a different adapter.
- The speakers on the wall are connected to the projector. When you plug your computer into the HDMI cable, it will switch to using the speakers. You can control the volume using the projector remote.
Wet Classroom (508):
- An NEC projector is available in the Wet Classroom. It is hung from the center of the room, facing the screen, and is powered on with a white NEC remote.
- The projector is accessible via HDMI. There is an HDMI cable connected to the wall port. You can connect via HDMI or the two attached adapters (USB-C and Mini DisplayPort). Please contact the IT Help Desk if you need a different adapter.
- The speakers on the wall are connected to the projector. When you plug your computer into the HDMI cable, it will switch to using the speakers. You can control the volume using the projector remote.
How to Use the VISIO TVs
VISIO TVs are available in the following classrooms at MLML: Dry Classroom and Think Tank
To reserve a time slot in one of these classrooms, visit MLML Calendars & Reservations
How to Use a VISIO TV:
- Power on by pressing and holding the power button located on the back of the TV in the bottom left corner, or with a remote checked out from the IT Help Desk.
- To change the input of the TV, press the power button repeatedly to cycle through input menu options, or using the input button on the checked out VISIO remote.
- The TV can be used with a personal laptop via an HDMI connection. The port for the HDMI cable is located on the wall directly below the TV. (Most PC's will have direct HDMI ports, while MAC's will need an HDMI to mini DisplayPort adapter).
- The TV is also connected to and can be used with a Mac Mini. A designated mouse and keyboard for the Mac Mini will need to be requested/checked out from the IT Help Desk.
- The TV’s speakers will only work with a personal laptop when the computer is connected via HDMI port.
- Volume must be adjusted on the TV or with the VISIO remote, not on the user’s computer.
How to use the Neat Bar with Zoom Room
There's a few ways to start the zoom meeting with the Neat Bar and Neat Pad. Below are the most common and simple ways of starting an online meeting.
Schedule the meeting using the room calendar
Best for meetings that can be scheduled ahead of time...
- Schedule a meeting using the intranet calendar and indicate you need the video conferencing unit.
- Once the event has been added, it will appear on the neat pad controller on the day of the event. Select the event and start the meeting
Start a meeting from your laptop computer
Best for unscheduled meetings and if you have your laptop with you
- Open the zoom application from your computer.
- In the upper left corner of the zoom window, you'll see an icon that looks like the image below. Click on that icon and the computer will now act like a remote control.

- Start the meeting from the Zoom application on the computer. The application will ask you if you would like to use the neat room. Choose this option. This will prevent any audio feedback from your laptop with the neat bar / zoom room.
Presenting from a laptop without a zoom meeting
- With the TV on, connect the HDMI cable to a laptop. The Neat Bar will change the input.
Troubleshooting and Resolving Technical Issues
- TV does not show any picture
- In rare cases, the TV needs to be fully reset. This can be done by unplug and plug the power to TV from the electrical outlet.
Seminar Room Presenter's Guide
Presenter’s guide to the projector in the Seminar Room
- View our Presenter's Frequently Asked Questions
- For information about Audio setup in the Seminar room visit our Audio Instructions Page
- For information on troubleshooting issues in the Seminar room visit our Troubleshooting Page
Reserve the Seminar Room
- NOTE: If you're a seminar speaker this has been done for you
- Seminar Reservation Request Form
- Fill out the required information > Click Submit
- An email will be sent to the manager of that resource
- A confirmation email will be sent to you when request has been processed
- Please arrive 30 minutes (3:30 pm) prior to the start of your presentation to allow setup and configuration time
Equipment provided in the Room
- Epson Projector
- Connects with an HDMI cable
- HDMI to mini DisplayPort adapter available at podium
- Need a different adapter? Please contact IT Help Desk
- Connects with an HDMI cable
- MacBook
- We recommend you use our Macbook provided
- Use of personal computer allowed with the aid of IT Help Desk Staff
- Laser Pointer
- Audio Cable
- Timer
- Tables and Chairs
- Note: arrive early to set this up ahead of time
- Microphones
- For seminars these microphones will be set to only record voices, not project them to the audience
Recording or Live Streaming
- Presentations/Events are recorded or live streamed straight to the MLML Youtube account
- This allows those not present to watch the event live, or allows for the recording to be shared at a later date
- Live streams/Recordings can be: Private, Public, or Unlisted (can only view if have direct link)
- NOTE: All MLML seminars are recorded for MLML internal community but the speaker has option to make the presentation stream live to public or not
- Our microphones will record the presentation/event
- Use of our Macbook highly recommended
- Allows for use of our Spotlight laser pointer, which can be seen through our capture device to those viewing virtually
- Regular laser pointers will not be seen virtually on slides
Formatting Presentation
- For best quality we recommend a 16:9 powerpoint presentation
- Follow link to learn how to format a 16:9 presentation
- If presentation created in a pre-2011 version of MS Office PowerPoint, we recommend that you save your presentation as a portable PowerPoint presentation
- Doing this will ensure any links and videos embedded in your presentation will be saved and transferred over without issue.
- Save presentation on flash drive whether using our Macbook or your personal computer
Before Event Prep
- Power on the projector using the Epson remote
- Check that it is connected to computer via black HDMI cord
- Wake up Macbook on podium
- Transfer presentation onto desktop of Macbook
- Open presentation and run through slides to photos, videos, and/or audio working properly
- If recording/live streaming you will be fitted with a Lapel Microphone
After Event Cleanup
- Remove presentation and flash drive from desktop of Macbook
- Leave Macbook powered on but close the computer to allow it to sleep
- Turn off projector using Epson remote
- Return equipment to HelpDesk Tech, adapters, Lapel Mic, laser pointer
- Turn off lights
Seminar Room Equipment Troubleshooting Guide
- For information about using the seminar room, visit our Seminar Room Presenter's Guide
- For information about Audio Settings, visit our Seminar Room Audio Settings
PROBLEM: Projector does not power on
POSSIBLE CAUSE #1: You may not be standing in the right location to control the projector with the remote.
- SOLUTION:
- Projector 2, the projector in the center, should be turned on and off while standing to the right of the podium.
- Projector 1, the projector to the presenter's right, should be turned on and off while standing in front of the door to the storage closet (Room 101B)
- Projector 3, the projector to the presenter's left, should be turned on and off while standing near the bottom of the ramp by the windows.
POSSIBLE CAUSE #2: The room may be too bright (for the signal from the remote to be detected).
- SOLUTION: The projectors respond best to the remote in a dimly lit room. Lower the shades and dim the lights if the projectors are not turning on for you. Also, the lamp in the projector needs to warm up in order for the projector to start projecting. Be sure to wait 10-20 seconds for the projector to turn on and warm up.
(NOTE: If you look closely at the bottom of the projector, you will notice 2 small lights, one green, one amber. When the projector powers on, the amber light turns off and the green light stays on.)
POSSIBLE CAUSE #3: The batteries in the remote may need to be replaced.
- SOLUTION: Aim the remote at a wall or the floor and press the Laser button to verify that the remote has power. If the laser is dim or not visible replace the batteries in the remote. Contact IT Services or the Front Office Staff for batteries.
_____________________________________________________________________________________________________________________________
PROBLEM: Computer image not displayed on projector (Projector displays "NO INPUT" message)
POSSIBLE CAUSE #1: The video cable is connected to the wrong video port on the podium or is not securely connected to the video port on the podium or the computer.
- SOLUTION: Reconnect the video cable to the podium and the computer. Verify that the video cable is securely connected to the video port on the podium corresponding to the desired projector.
POSSIBLE CAUSE #2: The projector is not powered on.
- SOLUTION: Verify that the projector is powered on. See the solutions in the "Projector does not power on" section above.
POSSIBLE CAUSE #3: The computer is not properly configured to send the video signal to the projector.
- SOLUTION (for MLML's MacBook Pro):
- macOS: Configure the video settings using the Displays preference pane in System Preferences.
- Open System Preferences. Click on the Apple menu and select the System Preferences Menu option
- Click on the "Displays" preference pane.
- Click the "Detect Displays" button on the "Display" tab.
(If the projector is not detected, check the connections at both ends of the video cable.)
- Windows: Manually configure the video settings to send the video signal to the projector:
- Clone the computer display on the projector using the "ATI Catalyst Control Center" display properties panel:
- Right-click on the desktop and select the "ATI Catalyst Control Center" menu option.
(NOTE: Be sure that you are using the Advanced configuration mode. To change from the Basic configuration mode to the Advanced configuration mode, simply click the "Advanced..." button on the lower-left corner of the ATI CCC.) - Under Graphics Settings, select Displays Manager.
- Right-click on the display labeled 2 (projector) and enable the display.
- Click on the display labeled "Desktop 2" and select "Clone Desktop 1 with monitor".
- Click Yes to confirm the configuration change, then click OK again to close the ATI CCC.
- Right-click on the desktop and select the "ATI Catalyst Control Center" menu option.
- Extend the desktop onto the projector (for Presenter View):
(NOTE: In order to use PowerPoint's Presenter View (aka. Presenter Tools), you must configure the video settings and display arrangement to use the "Extended Desktop" or "Dual View" setting rather than the "Clone" or Mirror" setting.)- Right-click on the desktop, select ATI Catalyst Control Center.
(NOTE: Be sure to use the Advanced configuration mode.) - Under Graphics Settings, select Displays Manager.
- Once the secondary display (projector) has been enabled, click on the display labeled "Desktop 2" and select "Extend main onto monitor".
- Click Yes to confirm the configuration change, then click OK to close the ATI CCC.
- Right-click on the desktop, select ATI Catalyst Control Center.
- Clone the computer display on the projector using the "ATI Catalyst Control Center" display properties panel:
- macOS: Configure the video settings using the Displays preference pane in System Preferences.
- SOLUTION (for user's personal computers):
- macOS: Open System Preferences, click Displays, then click the "Detect Displays" button.
(HINT: Check the "Show displays in menu bar" check box to add a shortcut to the Displays preferences settings to the menu bar.) - Windows: Manually configure the video settings on your laptop to send the video signal to the projector:
- Clone the computer display on the projector: Configure using 3rd party display properties panel:
- Right-click on your desktop, select the advanced configuration utility for your computer's video adapter if present. If the a link to the utility does not appear in the context menu, follow the steps below to open the configuration utility.
- Right-click on your desktop, select Properties, click on the Settings tab.
- Click the Advanced button, then click on the configuration tab for your video adapter (usually the upper-right tab).
- Select the appropriate configuration panel.
- Select the display mode:
- Select "Clone" or "Mirror" to display the same image on your computer and the projector.
- Select "Extended Desktop" or "Dualview" to extend your desktop to the projector.
- Configure the Primary and Secondary displays so the presentation displays as desired.
(NOTE: You may need to change the resolution on the projector and/or your computer in order for the image to display properly.)
- Right-click on your desktop, select the advanced configuration utility for your computer's video adapter if present. If the a link to the utility does not appear in the context menu, follow the steps below to open the configuration utility.
- Clone the computer display on the projector: Configure using 3rd party display properties panel:
- macOS: Open System Preferences, click Displays, then click the "Detect Displays" button.
POSSIBLE CAUSE #4: The projector is set to an incorrect video mode.
- SOLUTION: The video mode on the projector should be set to RGB2.
Press the RGB button on the remote to cycle through the video modes on the projector until "RGB2" appears in the upper-right corner of the projected image.
POSSIBLE CAUSE #5: The computer is not detecting the projector (and therefore, is not sending video signal).
- SOLUTION: If your computer does not detect or send video signal to the projector after you have configured your video settings, try the following procedure:
- Leave the projector powered on.
- Disconnect the video cable from your computer.
- Shut down your computer.
- Connect the video cable to your computer.
- Power on your computer.
_____________________________________________________________________________________________________________________________
PROBLEM: No sound/audio
POSSIBLE CAUSE: The audio/video system is not turned on.
- SOLUTION: Only IT Services personnel have access to the audio/video system in the Seminar Room. If you require audio for your presentation, please submit an IT Help Desk Ticket.
(If possible, please request assistance with audio setup 24 to 48 hours prior to your presentation.)
_____________________________________________________________________________________________________________________________
PROBLEM: No VHS video
POSSIBLE CAUSE: The audio/video system is not turned on.
- SOLUTION: Only IT Services personnel have access to the audio/video system in the seminar room. If you need to play a VHS video for your presentation, please submit an IT Help Desk Ticket.
(If possible, please request assistance 24 to 48 hours prior to your presentation.)
_____________________________________________________________________________________________________________________________
PROBLEM: Empty desktop appears on projector (no icons, menu, task bar, dock, etc.)
POSSIBLE CAUSE: The video configuration is set up to extend the desktop onto the projector. (rather than mirrored/cloned)
- SOLUTION: Change the video configuration from "extended desktop" to "clone" view. Follow the procedure for changing between "clone" and "extended desktop" view outlined in the "Computer image not displayed on projector" section above.
_____________________________________________________________________________________________________________________________
PROBLEM: Menu displays in the middle of a presentation
- SOLUTION: Stand in the proper location to control the projector, aim the remote at the projector, and carefully press the Cancel button to exit out of the menu.
Seminar Room Audio System Instructions
The Seminar Room is equipped with a built-in audio system that must be used to play audio from the computer on the podium (DVDs, internet video/music) or microphones. Instructions for setting up the audio system for these functions are below.
IMPORTANT! The A/V closet in the back of the Seminar Room is locked when not in use. Please obtain the key for the A/V closet from the Help Desk cubicle (Admin offices).
Set up computer audio: (for DVDs, internet video, and music)
- Power on the computer on the podium.
- Verify that the black audio cable on the podium is connected to the headphone jack on the computer and the 1/8" mini plug on the podium (between the left and center VGA/video ports on the podium).
- Open the A/V closet. In the A/V closet is a mixer (silver box on table) and an amp (large black box underneath table)
- Press the power button on the Power Amp at the bottom of the rack to turn on the audio system.
- Press the power button on the mixers.
- On the computer, start the audio or video you plan to play and adjust the volume on the computer to the desired level while the audio/video is playing.
PLEASE! Remember to turn off the amp and mixer, and lock the A/V closet door when you are finished.
Set up audio for microphones: (handheld and lapel mics are available)
- Please submit an IT Helpdesk Ticket to request assistance setting up the microphones. Thank you!
NOTE: The microphones must be checked out from the IT Help Desk cubicle located in the Admin office (Room 200).
Classroom iMac and Projector Instructions - Mac OS X
Classroom iMac and Projector Instructions - macOS:
- Wake up or power on the computer.
- Lower the projector screen.
- Power on the projector - Aim the remote at the projector and press the "Power" button, then wait for 10 to 20 seconds to allow the projector to power on.
- Verify that the video is displayed on the projector. The video signal should automatically be displayed on the projector. If the computer image does not display on the projector follow the procedure outlined below:
- Detect the projector:
- Open System Preferences. Click on the Apple menu and select the System Preferences Menu option.
- Click on the "Displays" preference pane.
- Click the "Detect Displays" button on the "Display" tab.
(If the projector is not detected, check the connections at both ends of the video cable.)
- Change between mirror and extended desktop view:
- Open the "Displays" System Preferences pane.
- Click on the "Arrangement" tab, then check the "Mirror Displays" check-box to display the same image on the computer and the projector.
(NOTE: To use Presenter View or Presenter Tools in PowerPoint, use the extended desktop setting. Uncheck the "Mirror Displays" setting to extend the desktop onto the projector screen.)
- Set the resolution (only if necessary):
- Open the "Displays" System Preferences pane.
- Click on the "Display" tab, then select a resolution that is compatible with the projector and the computer.
("1028 x 768 (stretched)" is generally the best balance of quality and compatibility.)
- Detect the projector:
- When you are finished using the computer and projector, please do the following:
- Remove any storage devices from the computer. (CD/DVDs, flash drives, etc.)
- Leave the computer powered on and allow it to sleep. Click on the apple menu and select "Sleep".
- Power off the projector - Press the Off button on the remote, when prompted to confirm, press the Enter button.
- Raise the projector screen.
- Turn off the lights.
- Return borrowed equipment to the IT Help Desk cubicle.
Classroom iMac and Projector Video Settings
Oceanography Classroom Projector Video Settings (30-Jul-2013)
These are the settings that appear in the classroom iMac System Preferences for Display when using either of the projectors.
Epson Powerlite 96w (projects to screen on the right, facing the classroom from the front):
Primary display, iMac: 1280x800
Secondary Display, Projector: 1024x768, 96Hz
Epson 435w Short throw projector (projects to white board on the left, facing the classroom from the front):
Primary display, iMac: 1680x1050, n/a
Secondary display, Projector: 1920x1080, 60Hz
Note: Cabling needs new labels, Epson 96w is not using HDMI.
Classroom iMac and Projector Troubleshooting Guide
Classroom iMac and Projector Troubleshooting Guide
_____________________________________________________________________________________________________________________________
PROBLEM: Computer image not displayed on projector (Projector displays "NO INPUT" message)
POSSIBLE CAUSE #1: The projector is not powered on.
- SOLUTION: Verify that the projector is powered on. See the solutions in the "Projector does not power on" section above for more information.
POSSIBLE CAUSE #2: The computer is not properly configured to send the video signal to the projector.
- SOLUTION A (for the Classroom iMacs):
- macOS: Open System Preferences, click Displays, then click the "Detect Displays" button.
- Windows: Manually configure the video settings to send the video signal to the projector:
- Detect the projector using the NVIDIA Control Panel.
- Right-click on the desktop and select the NVIDIA Control Panel menu option.
- Click on "Set up multiple displays".
- Click "My display is not shown in the list..."
- Click the "Rigerous Display Detection" button.
- Change between "clone" and "extended desktop" view:
(NOTE: In order to use PowerPoint's Presenter View (aka. Presenter Tools), you must configure the video settings and display arrangement to use the "Extended Desktop" or "Dual View" setting rather than the "Clone" or Mirror" setting.)- Right-click on the desktop and select the NVIDIA Control Panel menu option.
- Click on "Set up multiple displays".
- Click the "Clone" setting to display the same image on the computer and the projector,
- Click the "Horizontal Span" setting to extend the desktop onto the projector screen.
(This setting is necessary when using the Presenter View or Presenter Tools in PowerPoint.)
- Set the resolution (if necessary):
- Right-click on the desktop and select the NVIDIA Control Panel menu option.
- Click on the Profiles menu, select Load...
- Select the profile with the desired resolution (1024x768 generally works best) then click Open.
- Click Yes to confirm loading the video profile.
- Detect the projector using the NVIDIA Control Panel.
- SOLUTION B (for the Classroom iMacs): Leave the projector powered on and restart the computer. The image should display on the projector after the computer finishes restarting. If the image still does not appear on the projector, check the video cable connections and repeat the steps in SOLUTION A above.
- SOLUTION A (for user's personal computers):
- macOS: Open System Preferences, click Displays, then click the "Detect Displays" button.
(HINT: Check the "Show displays in menu bar" check box to add a shortcut to the Displays preferences settings to the menu bar.) - Windows: Manually configure the video settings on your laptop to send the video signal to the projector:
- Clone the computer display on the projector: Configure using 3rd party display properties panel:
- Right-click on your desktop, select the advanced configuration utility for your computer's video adapter if present. If the a link to the utility does not appear in the context menu, follow the steps below to open the configuration utility.
- Right-click on your desktop, select Properties, click on the Settings tab.
- Click the Advanced button, then click on the configuration tab for your video adapter (usually the upper-right tab).
- Select the appropriate configuration panel.
- Select the display mode:
- Select "Clone" or "Mirror" to display the same image on your computer and the projector.
- Select "Extended Desktop" or "Dualview" to extend your desktop to the projector.
- Configure the Primary and Secondary displays so the presentation displays as desired.
(NOTE: You may need to change the resolution on the projector and/or your computer in order for the image to display properly.)
- Right-click on your desktop, select the advanced configuration utility for your computer's video adapter if present. If the a link to the utility does not appear in the context menu, follow the steps below to open the configuration utility.
- Clone the computer display on the projector: Configure using 3rd party display properties panel:
- macOS: Open System Preferences, click Displays, then click the "Detect Displays" button.
- SOLUTION B (for user's personal computers): Leave the projector powered on and restart the computer. The image should display on the projector after the computer finishes restarting. If the image still does not appear on the projector, check the video cable connections and repeat the steps in SOLUTION A above.
POSSIBLE CAUSE #3: The projector is set to an incorrect video mode.
- SOLUTION A: The video mode on the projector should be set to "Computer" or "Comp". Open the small door on the remote and press the "comp" button to cycle through the video modes on the projector until the desired video mode appears in the upper-right corner of the projected image.
- SOLUTION B: Press the "Source" button on the bottom of the projector to cycle through the video modes until "computer" displays on the projector screen.
POSSIBLE CAUSE #4: The computer is not detecting the projector (and therefore, is not sending video signal).
- SOLUTION: If your computer does not detect or send video signal to the projector after you have configured your video settings as described above, try the following procedure:
- Leave the projector powered on.
- Disconnect the video cable from your computer.
- Shut down your computer.
- Connect the video cable to your computer.
- Power on your computer.
_____________________________________________________________________________________________________________________________
PROBLEM: Projector does not power on
POSSIBLE CAUSE #1 The remote is not powered on.
- SOLUTION: Move the power switch (labeled R/C) on the right side of the remote to the "ON" position. Press the "Power" button on the remote to turn on the projector.
(PLEASE! Make sure to turn the remote OFF when you are done using it.)
POSSIBLE CAUSE #2: The batteries in the remote may need to be replaced.
- SOLUTION: Replace the batteries in the remote. Batteries can be obtained from the IT Services Help Desk Cubicle (Rm 203 Admin Offices) or from the Front Office staff.
- WORKAROUND: Press the "Power" button on the bottom of the projector to turn the projector on without using the remote.
_____________________________________________________________________________________________________________________________
PROBLEM: Empty desktop appears on projector (no icons, menu, task bar, dock, etc.)
POSSIBLE CAUSE: The video configuration is set up to extend the desktop onto the projector. (rather than mirrored/cloned)
- SOLUTION: Change the video configuration from "extended desktop" to "clone" view. Follow the procedure for changing between "clone" and "extended desktop" view outlined in the "Computer image not displayed on projector" section above.
_____________________________________________________________________________________________________________________________
PROBLEM: No sound/audio
POSSIBLE CAUSE: The audio/video system is not turned on.
- SOLUTION: The iMacs in the classrooms are capable of playing audio through the computer's built-in speakers or through the audio system in the classroom. The audio systems in the classrooms are routed through the projectors. The projector must be powered on in order to route the sound through the speaker system. If you want to play audio through the audio system in the room make sure the projector is powered on and that the audio cable is connected to the headphone jack on the back of the iMac and the Xtron box in the classroom. If you require assistance with the audio setup for your presentation, please submit an IT Help Desk Ticket.
Think Tank Projector Operations
Orientation
Stand in the room facing the 2 Epson projectors. Projector #1 is on the left. Projector #2 is on the right. Each projector has a corresponding HDMI wall jack connector or can be operated using the wireless HDMI adapter available from the Library. Only Projector #2 can be controlled by the remote.
Projector #1
Manual operation only, does not work with remote at this time.
Projector #2
Remote control or manual operation.
There is also an HDMI floor jack connector under the brass plate in the floor.
Operation
Important - Before connecting your device to the projector minimize the volume on your device.
- Using the remote control, turn on the audio amp mounted above projector #2. You will see a red LED display "AUX" when the audio amp is on.
- Using the Epson remote control, turn on the power for projector #2.
- Connect your device using the wireless HDMI adapter or an HDMI cable to either the wall or floor jack.
- The projector will display HDMI connection.
- Your desktop will be displayed on the wall directly under the projector.
- Control the audio volume level from your device.
- When you have finished using the projector use the remotes to power off the projector and audio amp.
How to use the Laser Pointer USB remote control
Laser Pointer USB Basic Instructions
Components
- Laser pointer
- USB receiver
- Extra batteries
How to use it!
1. Plug the USB receiver into your computer
2. Open a Power Point presentation
3. The laser beam button, the page down button, and the page up button are all located along the side of the pointer with the laser beam emitting from the end with the buttons
4. The page down and up buttons can be used to move between slides in your presentation
How to Use the Meeting Owl Pro
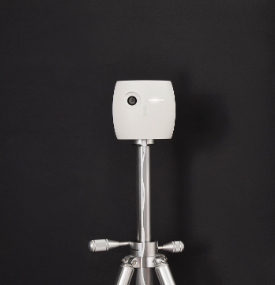
The Meeting Owl Pro is a 360degree camera/microphone for video conferencing and remote instruction, it may be used with any classroom or personal computer, and is available for checkout at the IT Help Desk.
How to Use the Meeting Owl Pro:
- Plug USB and power cables into the Bottom of the Meeting Owl. Power on by pressing and holding the power button located on the back of the Owl.
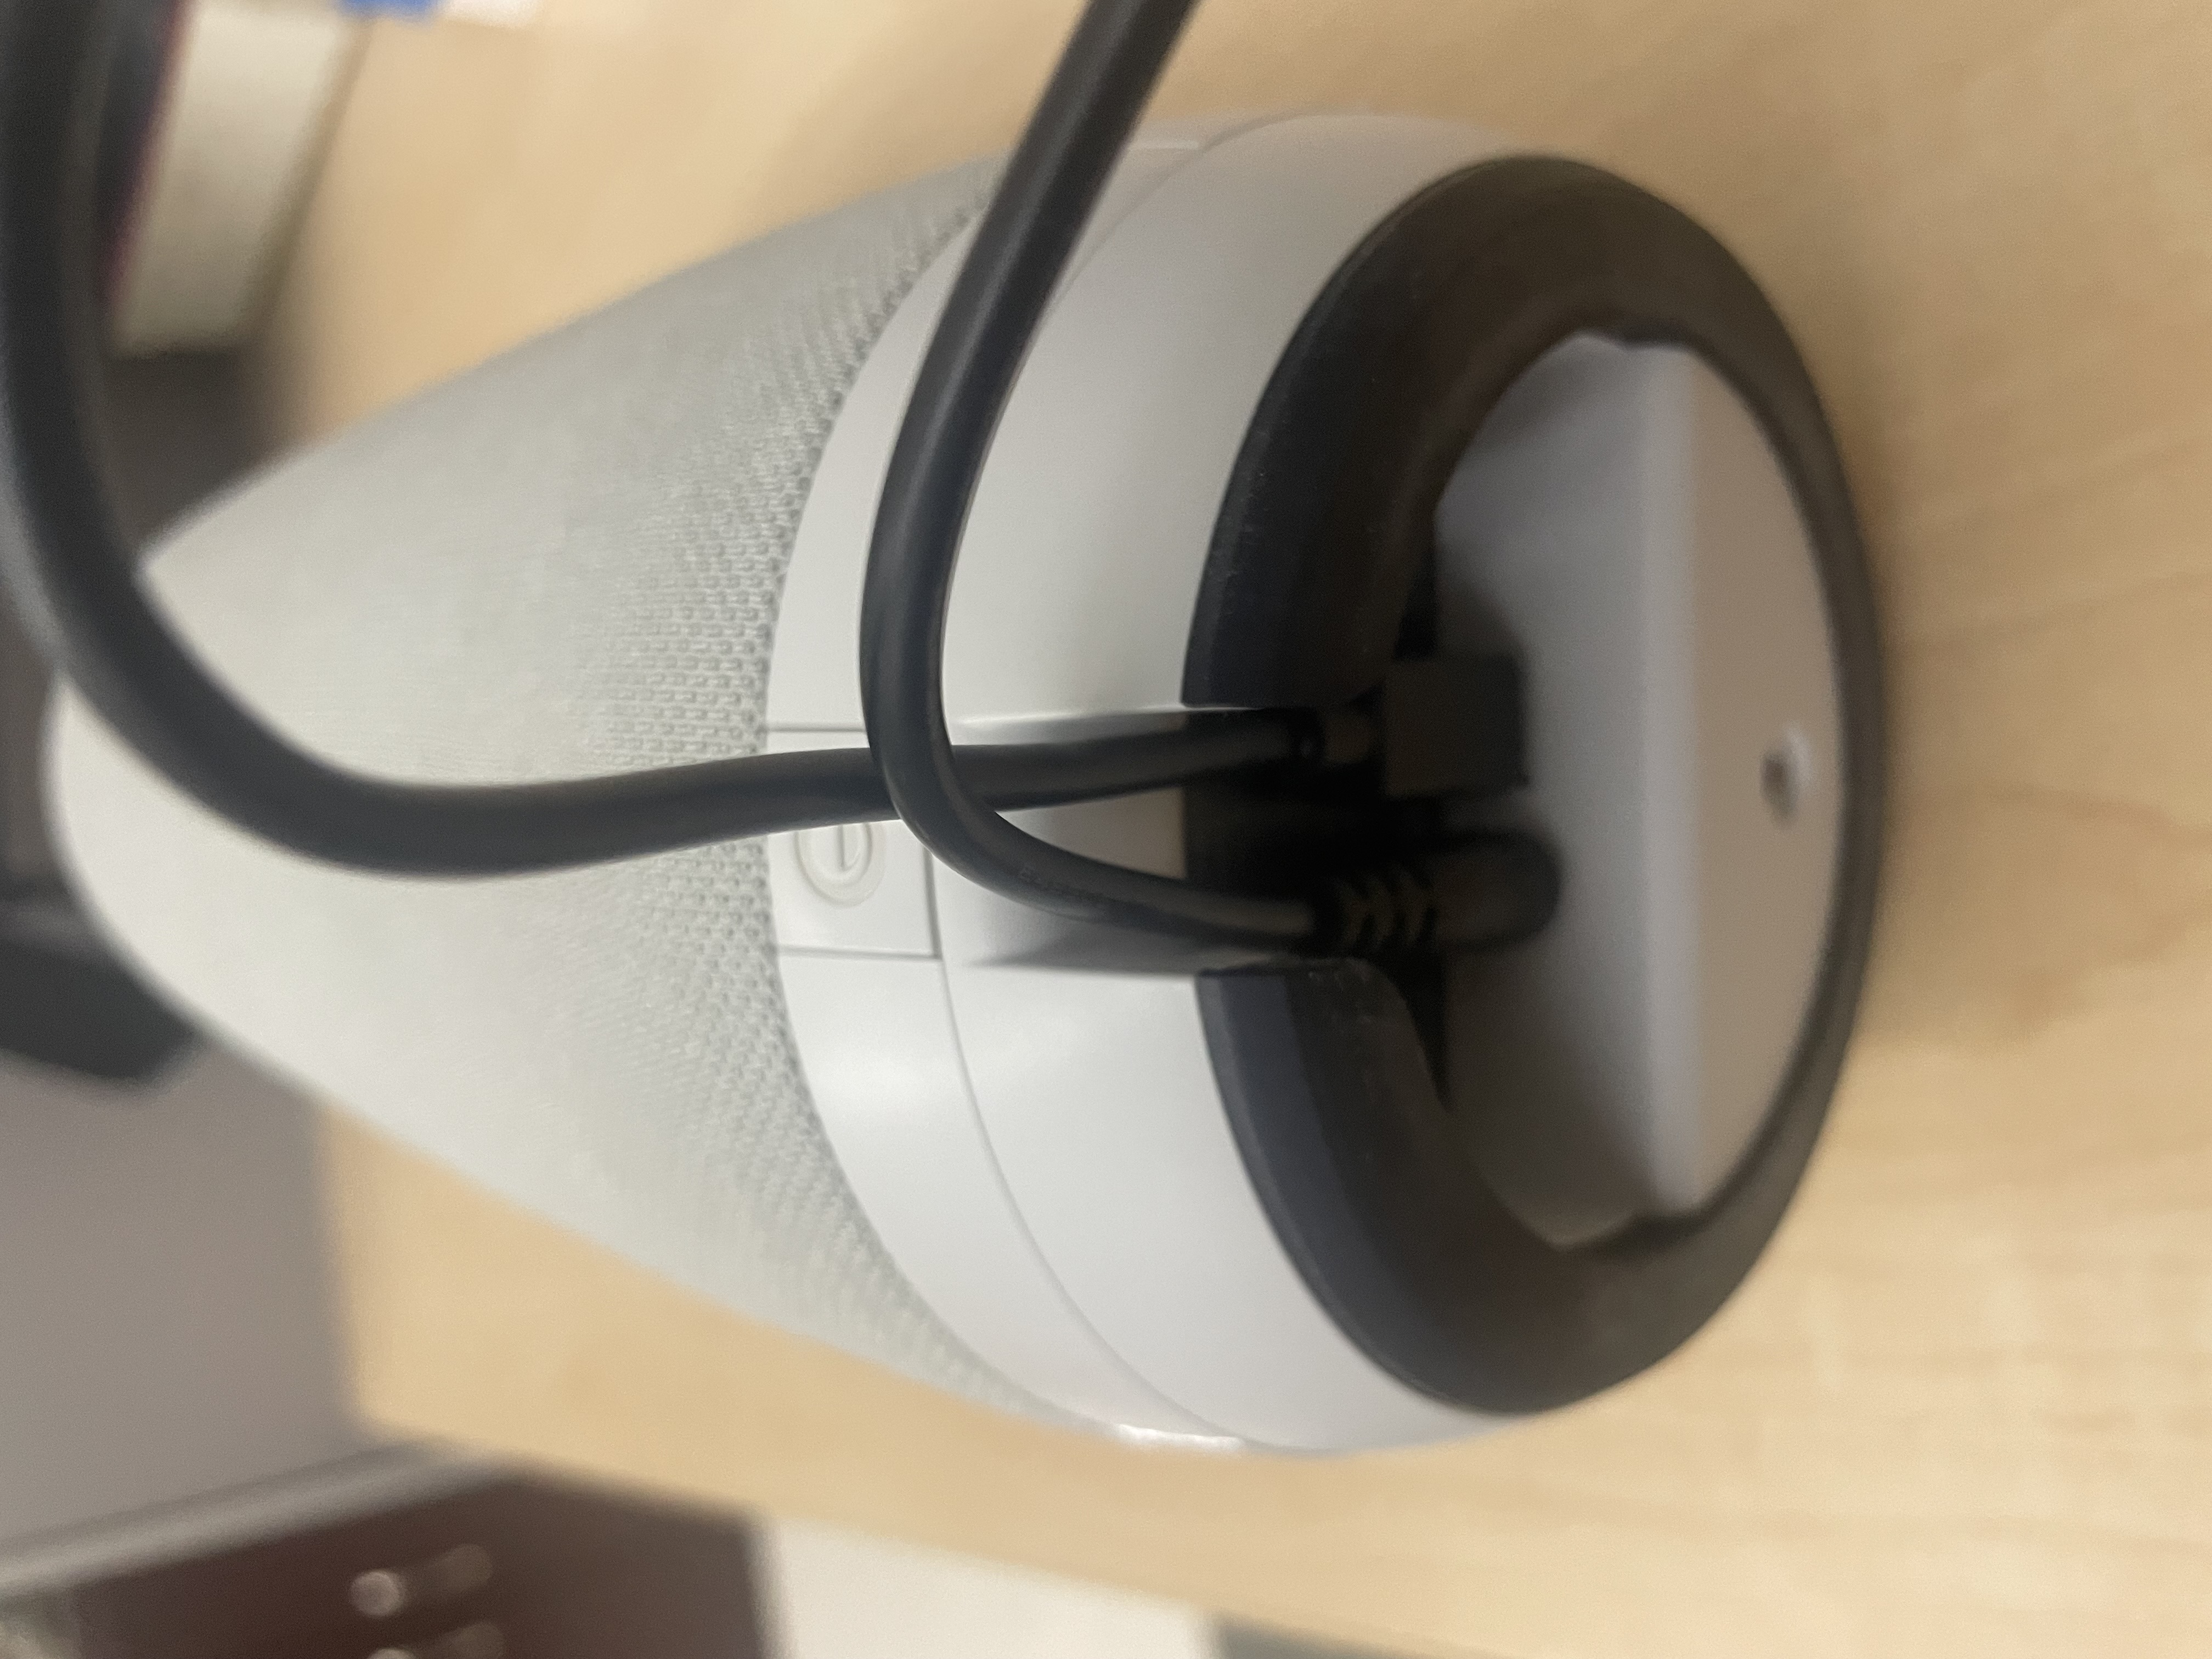
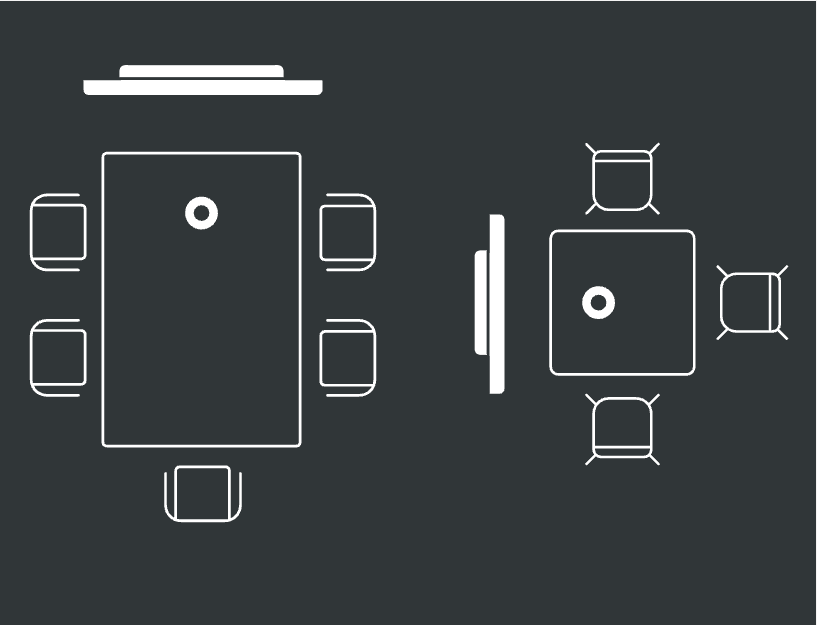
- Place Owl on tabletop in center of meeting. The camera will automatically track the person actively speaking.
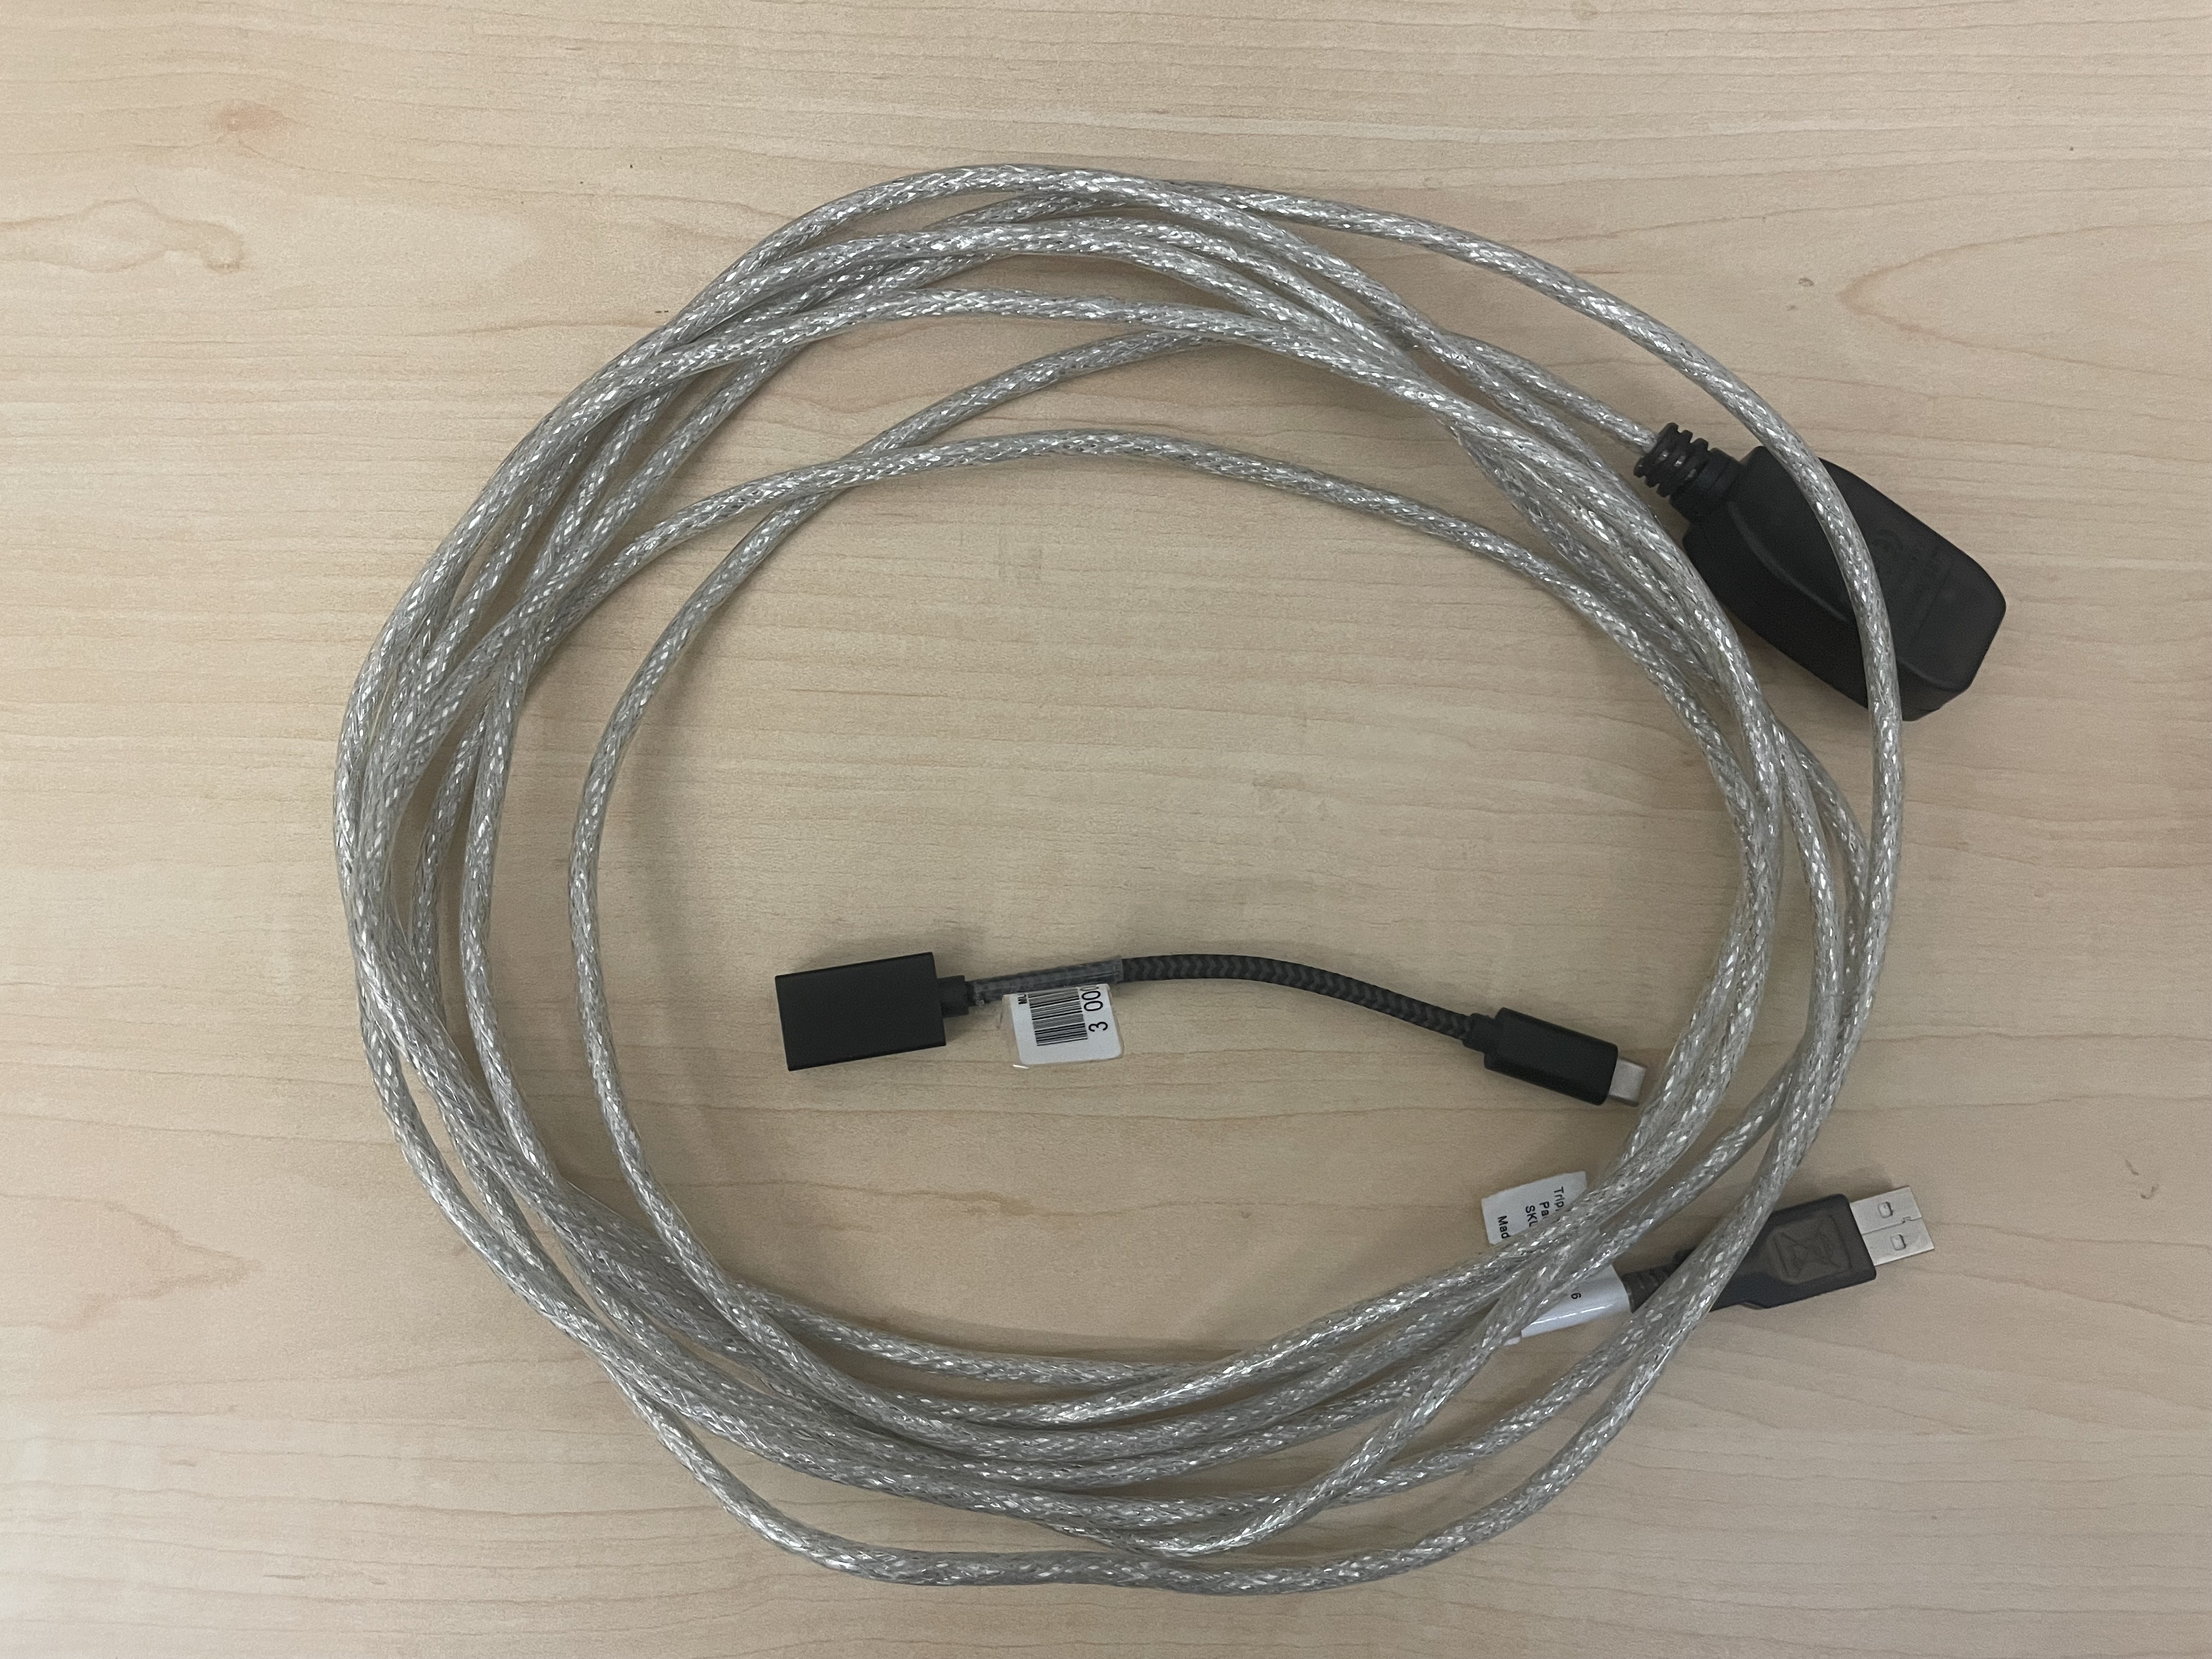
- Plug USB cable into the computer being used. In larger rooms like the Think Tank, a USB-A to USB-C adaptor will be necessary to connect the Meeting Owl to the TV and Mac Mini.

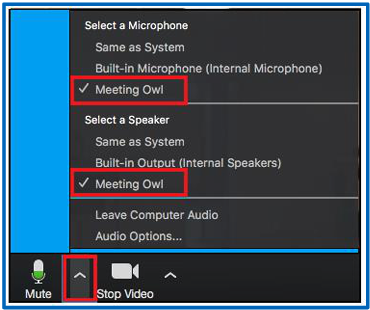
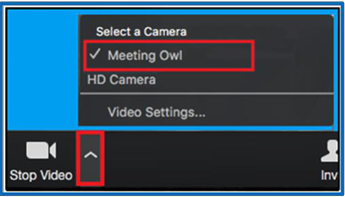
- Launch Zoom or other conferencing platform and select Meeting Owl for Video and Microphone.
- Start your meeting.
- Further setup tips can be found here.
How to Use the Whiteboard Owl
The Whiteboard Owl is camera for capturing video of a whiteboard for conferencing and remote instruction, it may be used with any classroom or personal computer, and is available for checkout at the IT Help Desk. The meeting Owl Pro is required to use the Whiteboard Owl.
How to Use the Whiteboard Owl:
- Setup Meeting Owl Pro. Instructions can be found here.
- Attach Whiteboard Owl to a tripod using the screw mount on the back of the Whiteboard Owl.
- Plug in Whiteboard Owl and position tripod so that the camera faces the whiteboard.
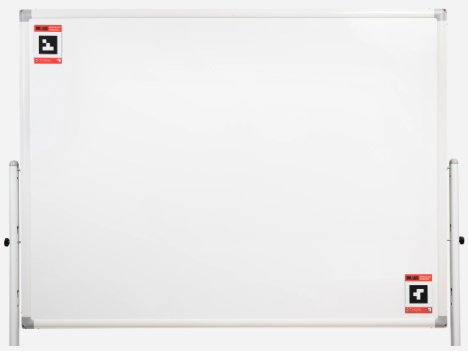
- Place one Whiteboard Tag in the top-left corner of the whiteboard and the other Whiteboard Tag in the bottom-right corner of the whiteboard.
- The tag must be upright, with the Owl Labs logo at the top. It does not matter which side of the Whiteboard Tag is facing out.
- LED Behavior:
- The LED on the Whiteboard Owl will blink throughout the setup process.
- When the first meeting is started:
- The LED will turn solid when the Whiteboard Tags are in view of the camera.
- The Whiteboard Owl will automatically crop the camera field of view based on the placement of the Whiteboard Tags.
- Start a meeting using your preferred video conferencing software. Make sure the Meeting Owl Pro is selected as your camera, speaker, and microphone.
- Change the camera view to the Whiteboard Owl by turning over one of the Whiteboard Tags.
- Switch back to the Meeting Owl Pro view by turning over one of the Whiteboard Tags again.
- Further setup tips can be found here.
How to Use the Jabra Bluetooth Speaker for Zoom Meetings
Jabra bluetooth speakers are available for the following classrooms at MLML and can be retrieved from the IT Helpdesk: Dry Classroom, Think Tank, and Seminar Room.
To reserve a time slot in one of these classrooms, visit MLML Calendars & Reservations
How to Use a Jabra Bluetooth Speaker for Zoom Meetings:
- Power on TV and change input to Mac mini on TV.
- If the TV says “No Input,” look behind the TV to find the Mac mini and gently tap the power button.
- If you are in the Seminar Room, instead power on the Mac on the pedestal and use it for all of the instructions concerning the Mac mini.
- Log into the Mac mini.
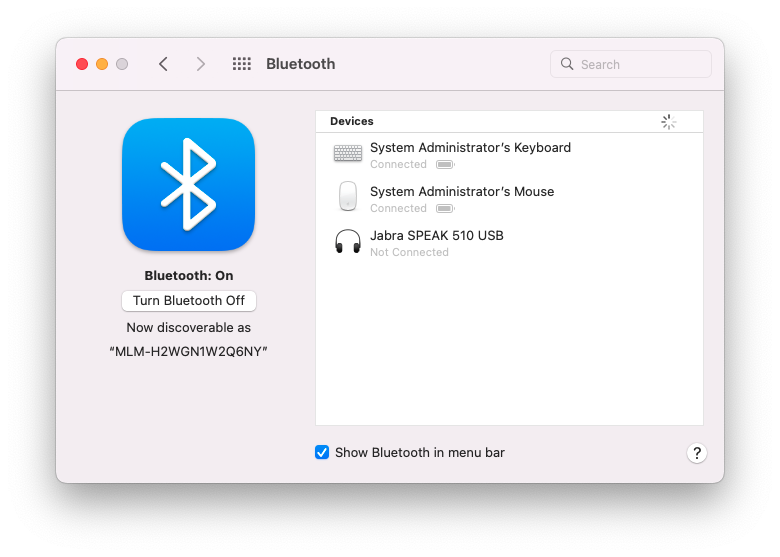
- Power on the Jabra bluetooth speaker by holding the power button until it lights up.
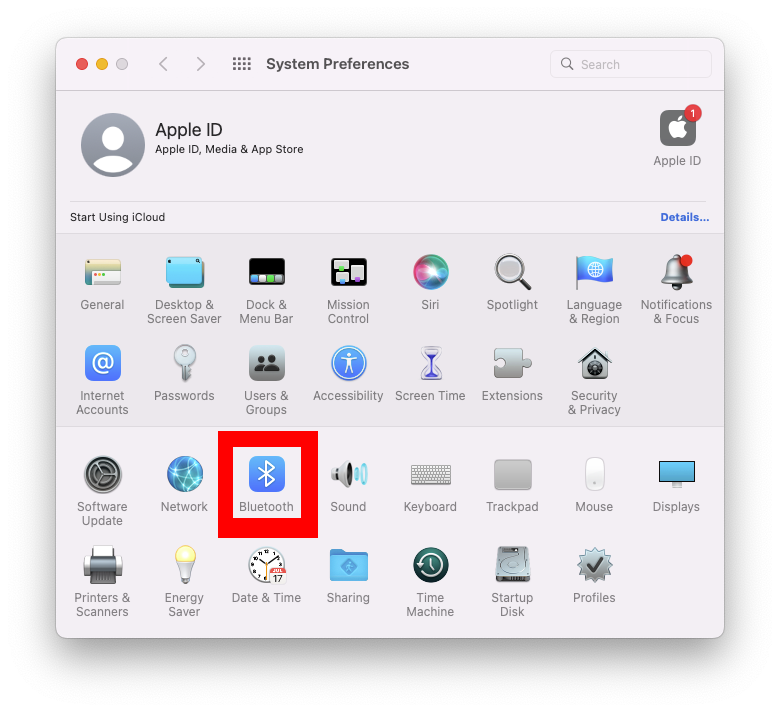
- Open the bluetooth settings on the Mac mini, which can be found under System Preferences.

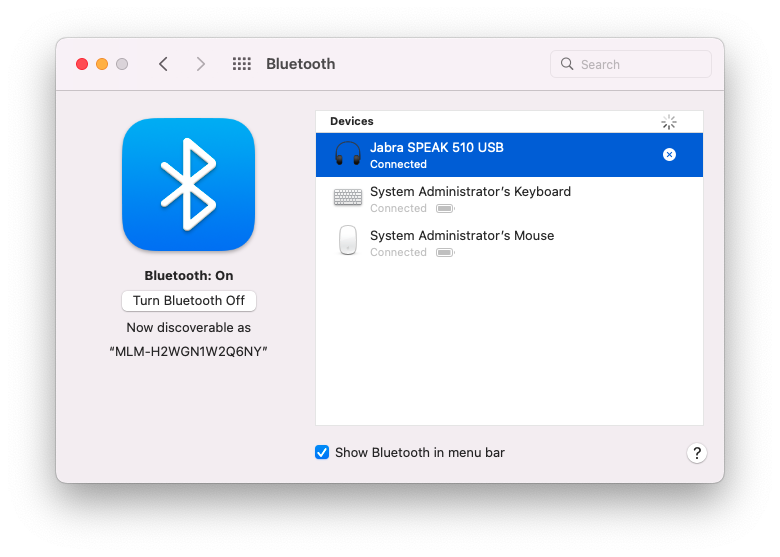
- If the Jabra is an option, double click on it.


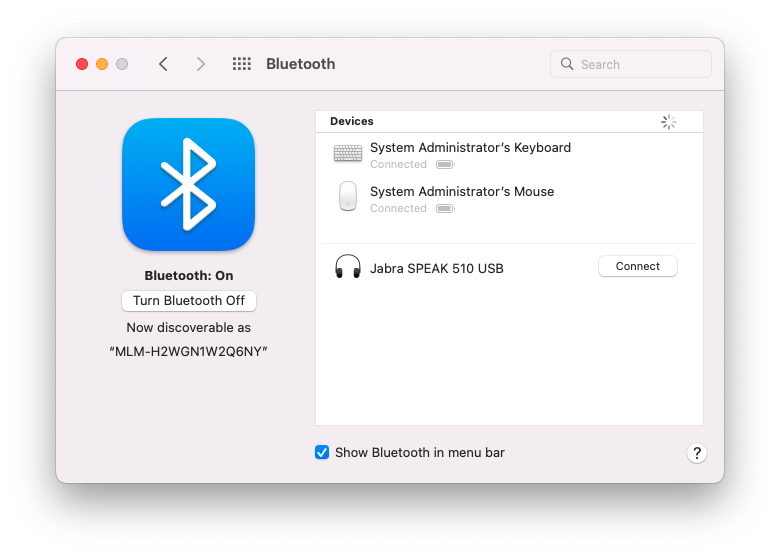
- If the Jabra is not an option, hold the bluetooth button on the Jabra for 5 seconds until you hear the Jabra say “To connect the Jabra SPEAK 510…”. The option for the Jabra should appear with the word connect. Click connect, and wait for the Jabra to connect.


- If the Jabra is an option, double click on it.
- Open Zoom on the Mac mini.
- Start or join the meeting on Zoom on the Mac mini.
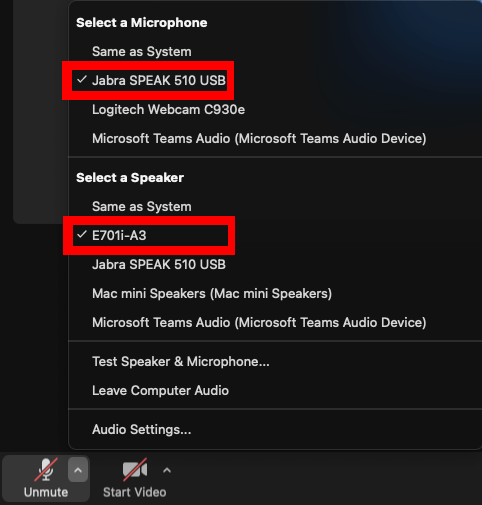
- On Zoom, set the microphone to “Jabra SPEAK 510 USB”
- Set the speaker to “E701i-A3” or “E701i-B3” (only one of the two will be available).
- If you are in the Dry Classroom, the volume of the speaker can be changed from the computer. If you are in the Think Tank, you will need to press the volume buttons on the side of the TV.

- If you are in the Dry Classroom, the volume of the speaker can be changed from the computer. If you are in the Think Tank, you will need to press the volume buttons on the side of the TV.

The setup should now be ready.
Meeting Owl - Quick Start Guide (Dry Classroom / Think Tank)
The Meeting Owl Pro is a 360 degree camera with microphone for video conferencing. The Meeting Owl is set up in the Dry Classroom / Think Tank for easy plug-and-play use. Here is a quick guide, along with troubleshooting steps when using Zoom.
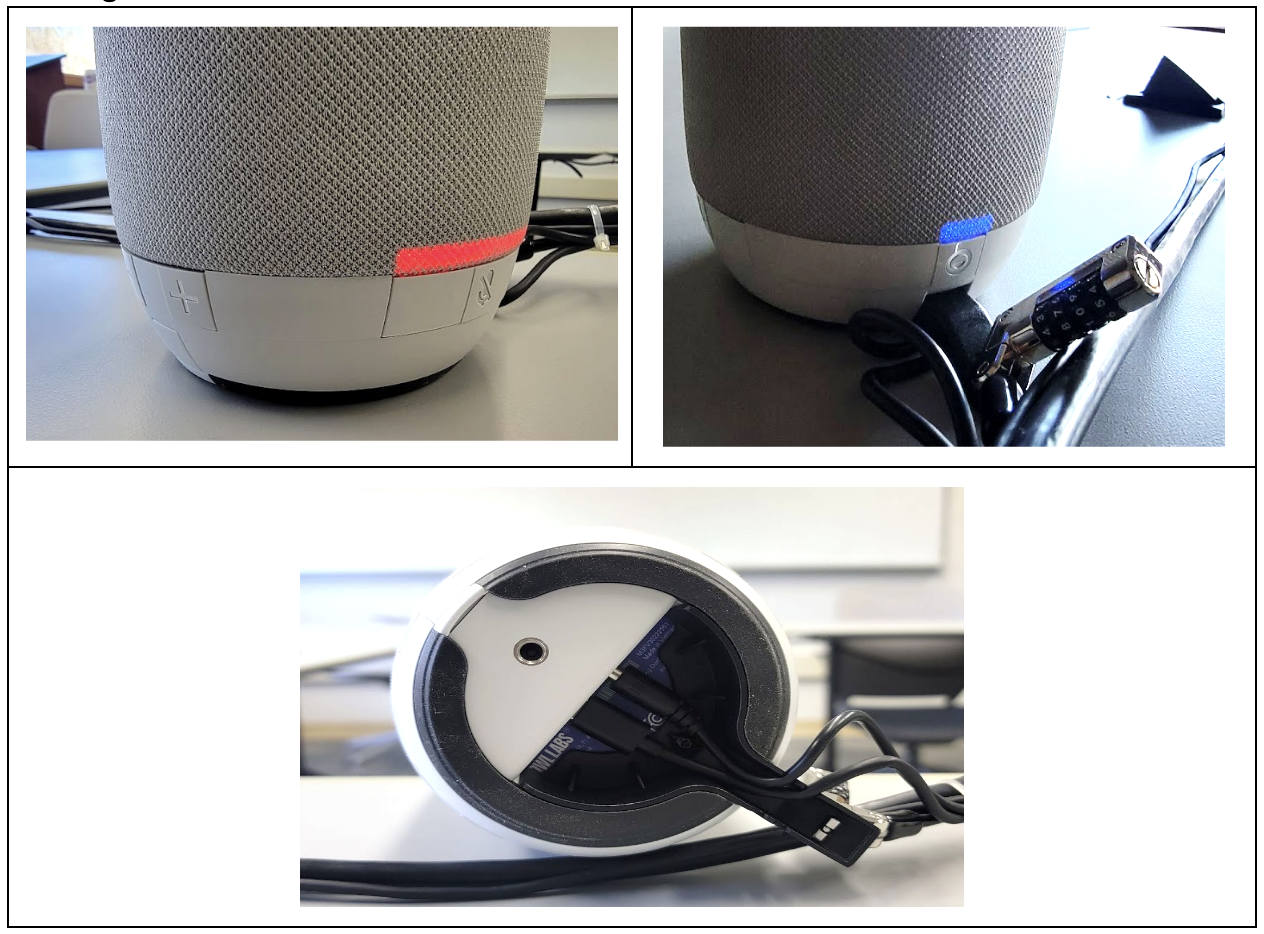
Step 1- Turn on Owl
Meeting Owl has been connected to the power. You will see the Owl’s eye illuminate and pulse. After a few seconds, you will hear a hoot. This indicates the Meeting Owl is ready to use.
Step 2- Turn on the TV and Mac Mini behind the TV.
Note: Mac Mini remains turned on at all times, turning on the wireless keyboard and mouse and pressing any key will wake up the machine.
Step 2a- TV Source: Select Mac Mini
Step 3- Login to Mac Mini using the local account (mlmluser/mlml1234)
Step 4- Zoom - Join a meeting with a meeting ID or sign in using the SSO option.
Open your preferred video conferencing software (Zoom, Microsoft Teams, Google Meet, etc.).
Step 5- Meeting Owl should be automatically selected for both audio and video. Otherwise, select the Meeting Owl for the camera, microphone, and speaker.
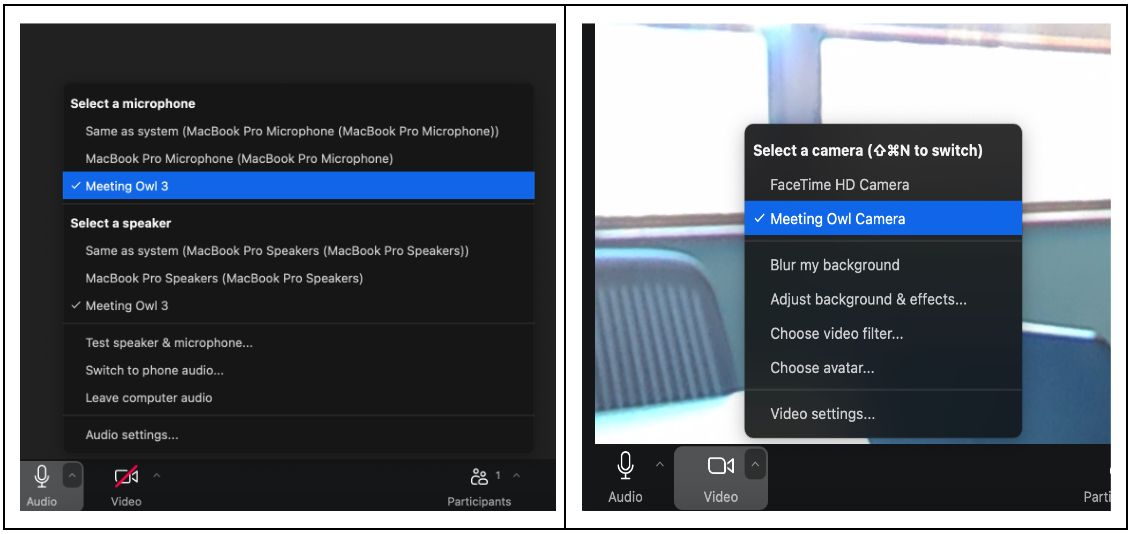
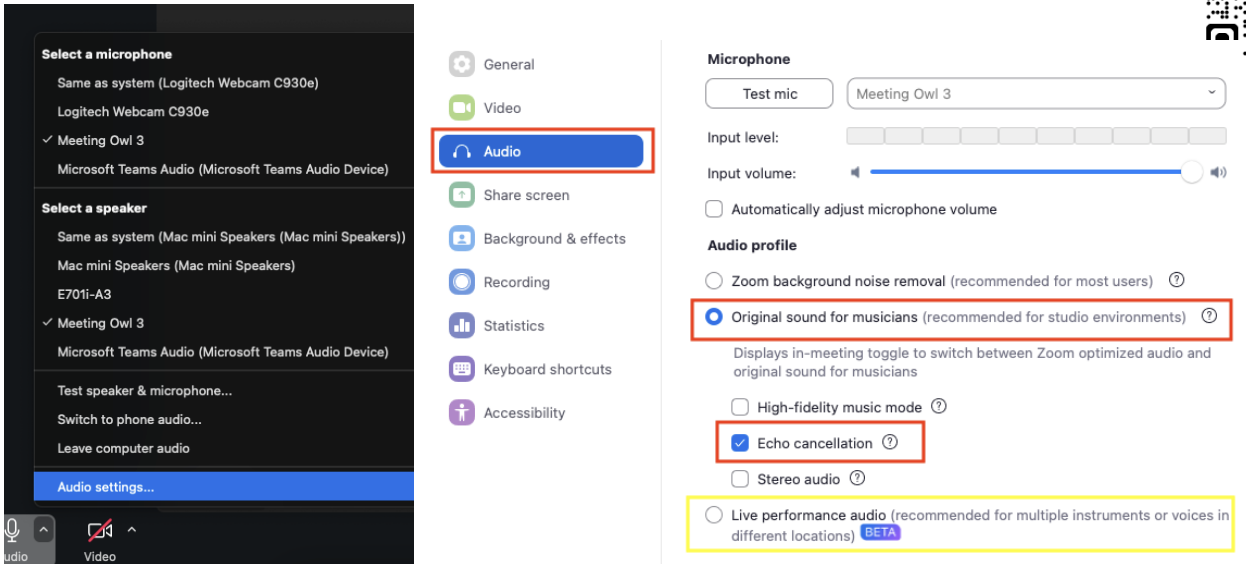
Step 6- For the best audio performance for remote guests, go to Audio Settings > Audio > Audio Profile. Select Original Sound for musicians with echo cancellation or Live Performance audio.
Meeting Owl buttons
Optional: Meeting Owl App on Mac Mini App Folder.
This allows you to gain access to advanced features and capabilities. Search for “Meeting Owl” in your App Store to find the app.

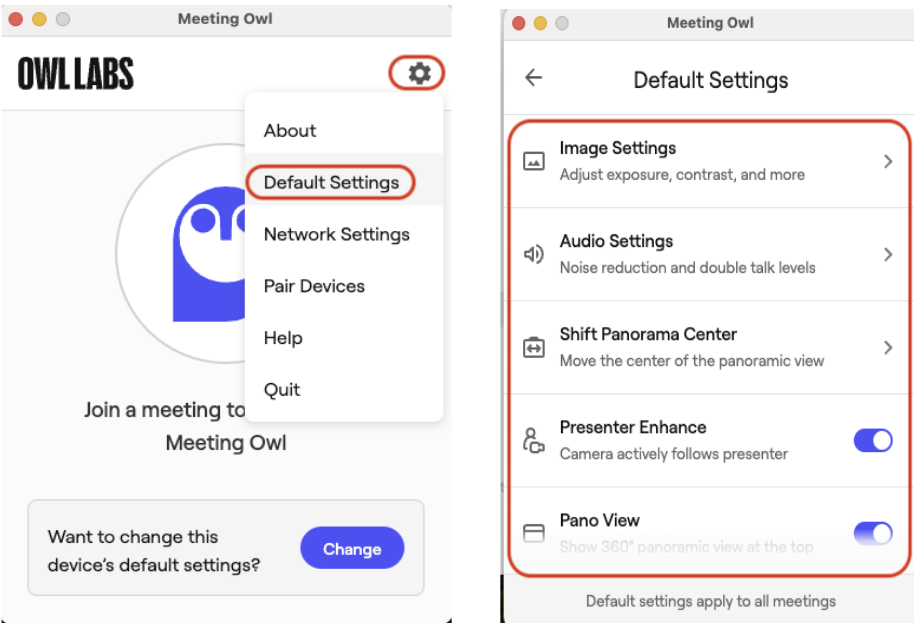
Meeting Owl Application: Default Settings
Advance settings for video and audio performance.
Default Settings:
-
Shift Pano Center - Shift the alignment of the Owl's Panoramic video feed.
-
Pano View - Turn on or turn off the Owl's Panoramic video feed.
-
Vertically Flip Owl Camera - Flip the Owl's video 180° to accommodate ceiling mounts.
-
Presenter Enhance - The Owl's camera actively follows a presenter.
-
Ignore Zone - Select a video area for the Owl to ignore.
-
Audio Settings - Adjust the Owl's advanced audio levels to reduce echo, dropouts, or background noise in your environment.
-
Image Settings - Adjust the Owl's advanced image levels to improve video quality in your environment.
Please be mindful of any changes to these settings. Any changes made to these settings will remain unless they are changed back to default settings.
Troubleshooting Tips
No Power:
-
Check power connections and ensure the power adapter is securely connected to both the Owl and the power outlet.
-
Hard restart the Meeting Owl. Unplug the Owl, wait 10 seconds, and plug it back in.
Owl Not Recognized by Mac Mini:
-
Ensure the USB cable is securely connected to both the Owl and the Mac Mini.
-
Try connecting the USB cable to a different port on the Mac Mini
Poor Audio/Video Quality:
-
Adjust audio and video settings in your video conferencing Application: i.e., Zoom.
Under Audio Settings > Audio > Audio Profile. Select:
-
-
Original Sound for musicians with echo cancellation
-
Live Performance audio. Ensure a stable internet connection.
-
-
2. Ensure a stable internet connection.
Audio and/or Video Not Working:
-
Microphone issues. Ensure the Owl’s microphone is selected in the video conferencing Application: i.e., Zoom.
-
Check if the microphone is muted in the software.
-
Ensure the Owl’s camera is selected in the video conferencing Application: i.e., Zoom.
-
Update your video conferencing Application: i.e., Zoom to the latest version.
Echo or Feedback:
-
Move other computers away from Meeting Owl.
-
Lower the volume on the Mac Mini or the conferencing Application: i.e., Zoom.
Ensure only one microphone is active at a time to avoid feedback loops.
Need more help? >>>> Submit a help ticket! We’re here to help you.
Other Resources:
https://www.youtube.com/watch?v=Z8v5aeOfNOY