| ##### IMPORTANT: - - There are three parts to this process: 1. Downloading the [Konica Minolta driver](https://onyxweb.mykonicaminolta.com/OneStopProductSupport?appMode=public&productId=2276&categoryId=1&subCategoryId=ft0) 2. Installing the printer on your device 3. Configuring the printer properly - All three parts are outlined below - **Please complete all three and follow these instructions completely. Otherwise, you will be unable to print successfully.** - If you encounter any problems, please come by the IT Help Desk in the main office or [submit a Help Desk ticket.](https://helpdesk.mlml.calstate.edu/) |
These are instructions for setting up the new Konica Minolta copiers that were installed in December 2021 on Windows machines. If you find something that is out of date, please [submit a Help Desk ticket](https://helpdesk.mlml.calstate.edu/).
### **1. Download the printer driver** - - Click [this link](https://onyxweb.mykonicaminolta.com/OneStopProductSupport?appMode=public&productId=2276&categoryId=1&subCategoryId=undefined) to be taken to the Konica Minolta driver website for this printer (C550i). - Click on the category for your operating system (most likely Windows 10 64-bit) - The page has multiple files available for download. Download the newest version of the full printer driver (.zip), as shown below. There may be a newer version than what is shown in this screenshot. [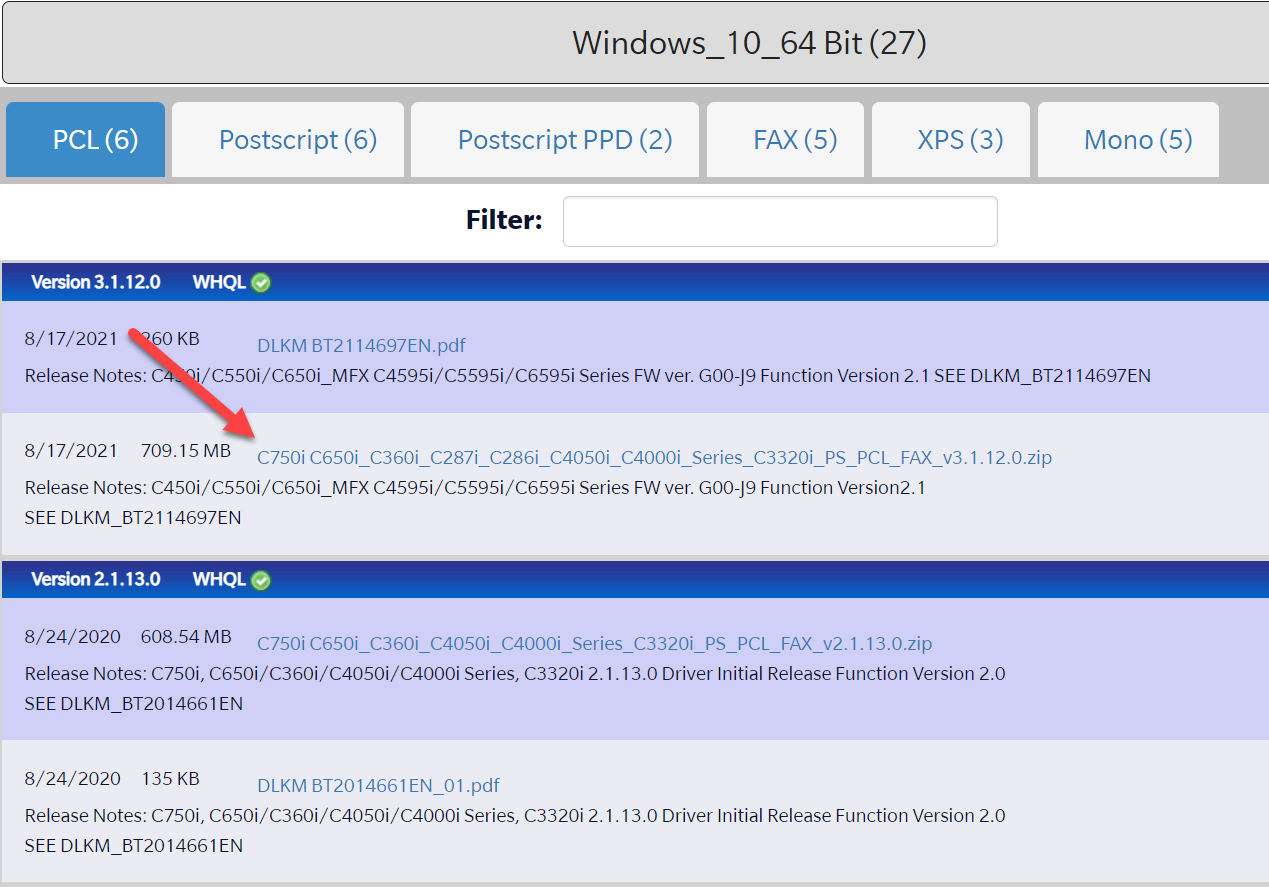](https://kb.mlml.sjsu.edu/uploads/images/gallery/2023-09/c550i-newest-version.PNG) - Save the .zip file to your computer, and open it when the download is complete. - Extract the files to a folder: [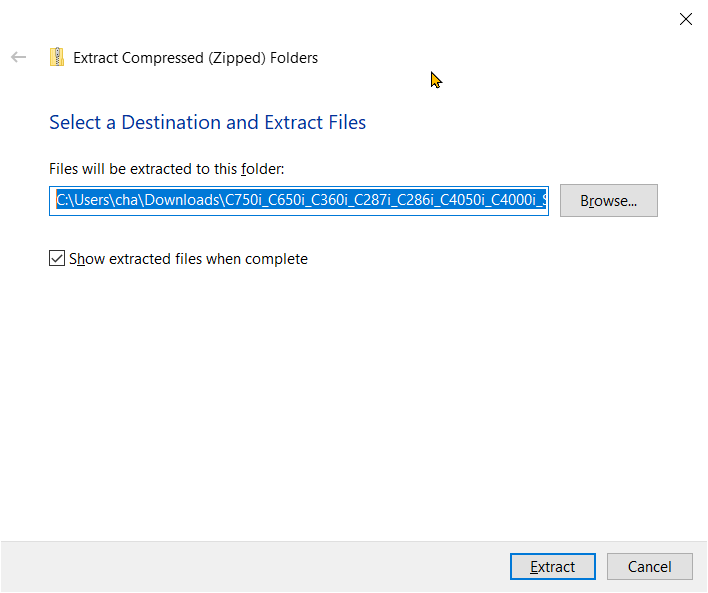](https://kb.mlml.sjsu.edu/uploads/images/gallery/2023-09/extract-to-folder.png) - Most of the time, it will offer to extract the contents to same location where the zip file is saved (ex: Downloads folder) ### **2. Add the printer** - 1. Open the Windows Start Menu and find the Settings app: 2. - - In Settings, click Devices > Printers & scanners - Click Add a printer or scanner. - At the bottom of the list of printers, click The printer I want isn’t listed. [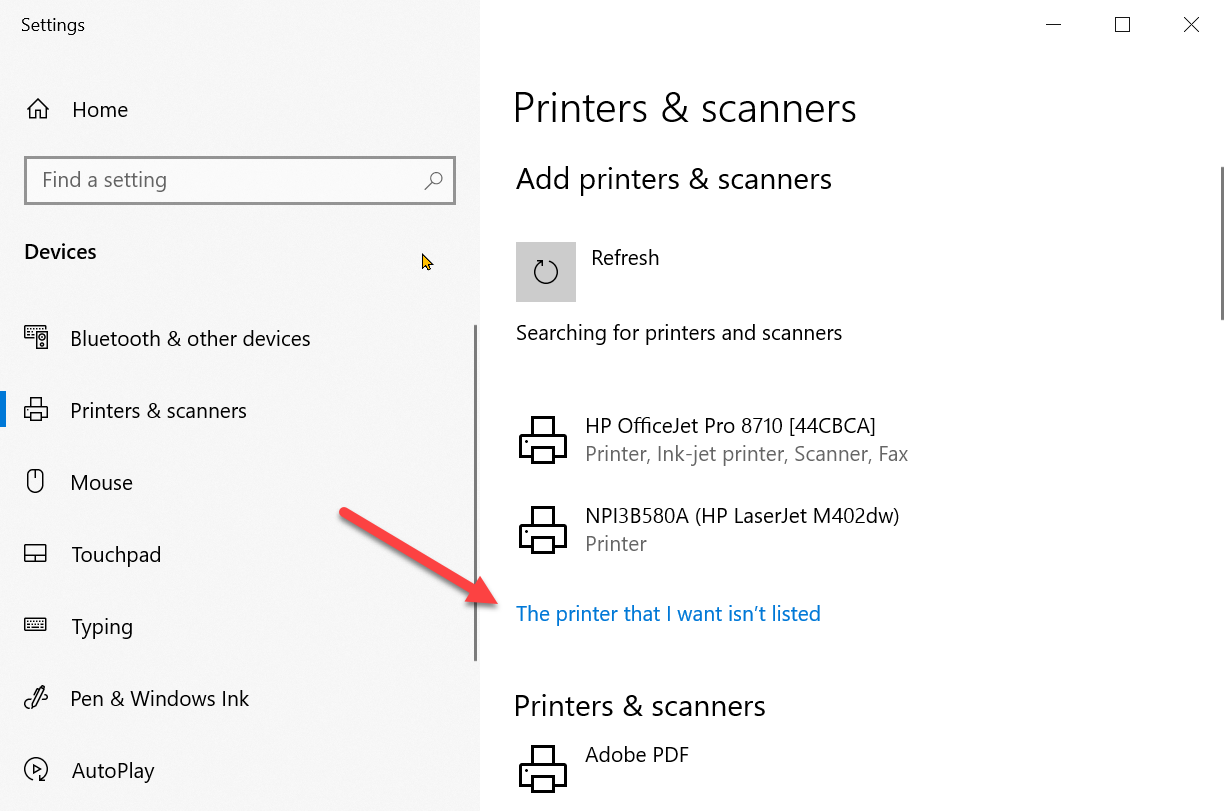](https://kb.mlml.sjsu.edu/uploads/images/gallery/2023-09/add-a-printer-notlisted.png) - Select Add a printer using an IP address or hostname and click Next.[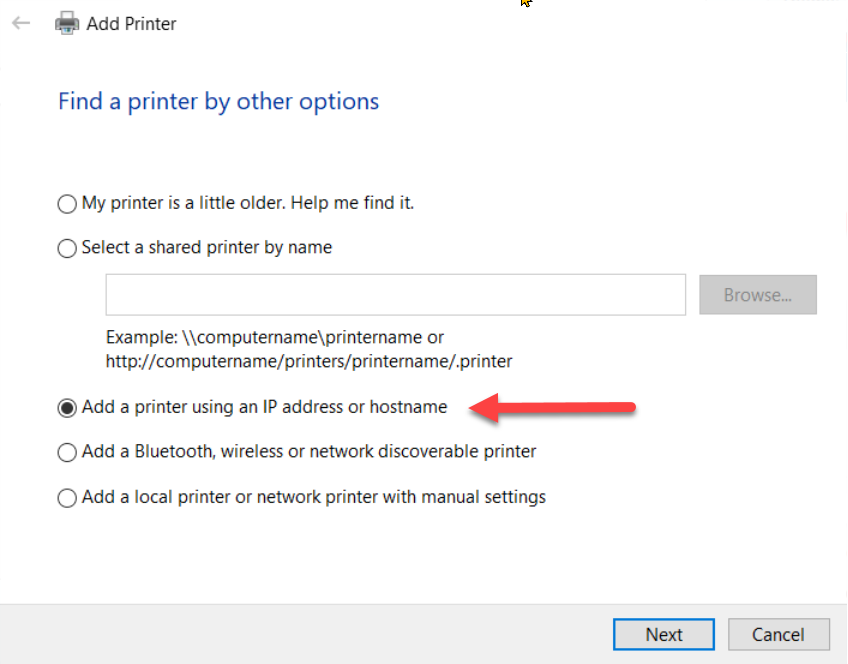](https://kb.mlml.sjsu.edu/uploads/images/gallery/2023-09/extract-to-folder.png) - Enter the following information: - Device type: **TCP/IP Device** - Hostname or IP Address: - Library Copier: **mlm-library-printer.sjsu.edu** - Admin Office copier: **mlm-admin-printer.sjsu.edu** - Port name: this will auto-fill based on the hostname entered, you don’t need to change it. - UNCHECK **Query the printer and automatically select the driver to use**. [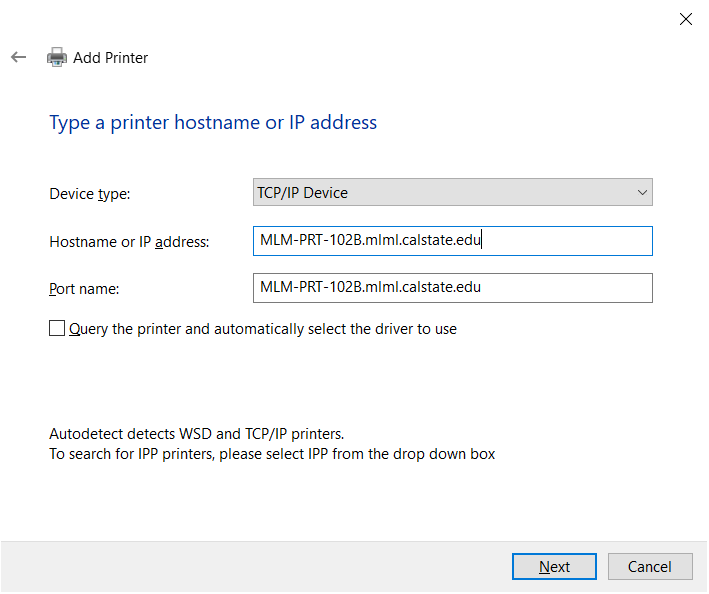](https://kb.mlml.sjsu.edu/uploads/images/gallery/2023-10/tcpip-setup.png) - Click Next. - You may be told that additional port information is required. Leave Generic Network Card selected and click Next. - Click Have disk. [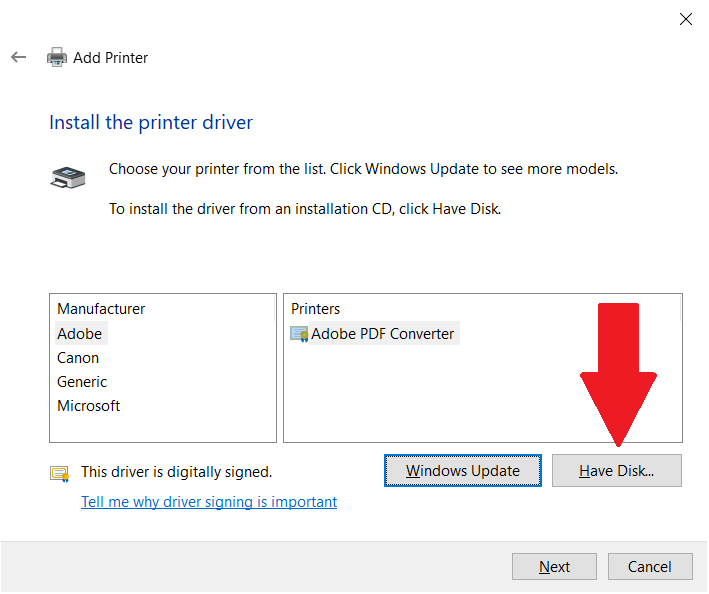](https://kb.mlml.sjsu.edu/uploads/images/gallery/2023-10/GN0havedisk-setup.png) - Click Browse and locate the folder that you extracted containing the driver files in Step 1. - Inside the folder, navigate to Drivers/PCL/EN/Win\_x64/ - Select the .inf file that appears in the folder and click Open. [](https://kb.mlml.sjsu.edu/uploads/images/gallery/2023-10/havedisk-setup2.png) - Click OK and then Next. - Select KONICA MINOLTA C650iSeriesPCL from the list of drivers (The 550i and 650i use the same software): [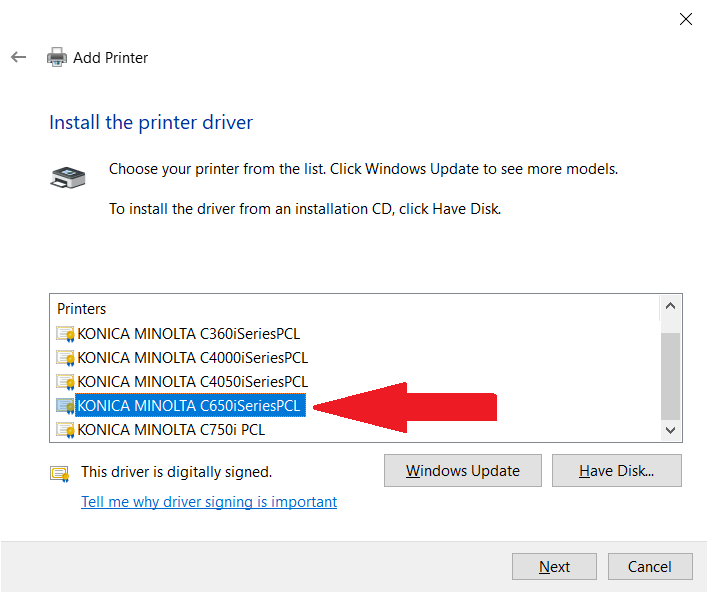](https://kb.mlml.sjsu.edu/uploads/images/gallery/2023-10/install-printerdriver.png) - Name the printer (E.g. “Library Copier - Room 102B” or “Admin Copier - Front office”) [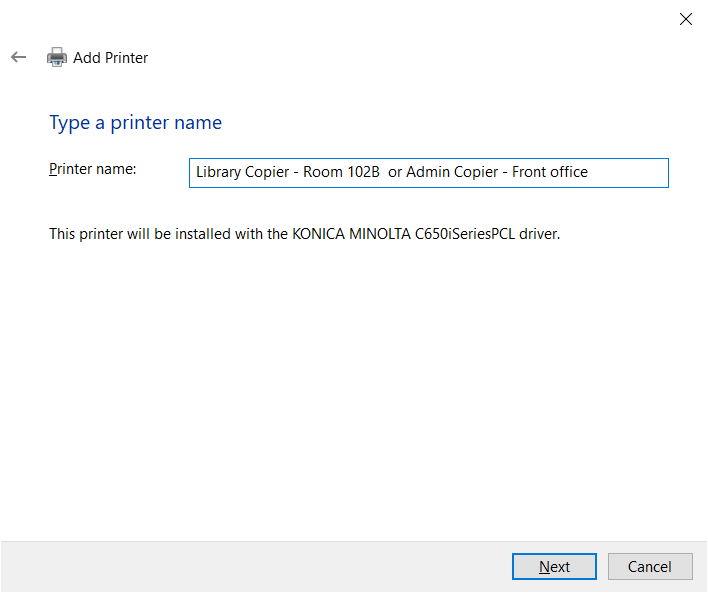](https://kb.mlml.sjsu.edu/uploads/images/gallery/2023-10/naming-printer.png) - Click Next. - You will be asked if you want to share the printer on the network. Select Do not share this printer and click Next. [](https://kb.mlml.sjsu.edu/uploads/images/gallery/2023-10/naming-printer.png) - Click Finish. Do not print a test page. Uncheck the box for "Print a test page" if applicable. ### **3. Set Default Printing Settings** - - Find the copier in your list of printers and click on it, then click Manage: [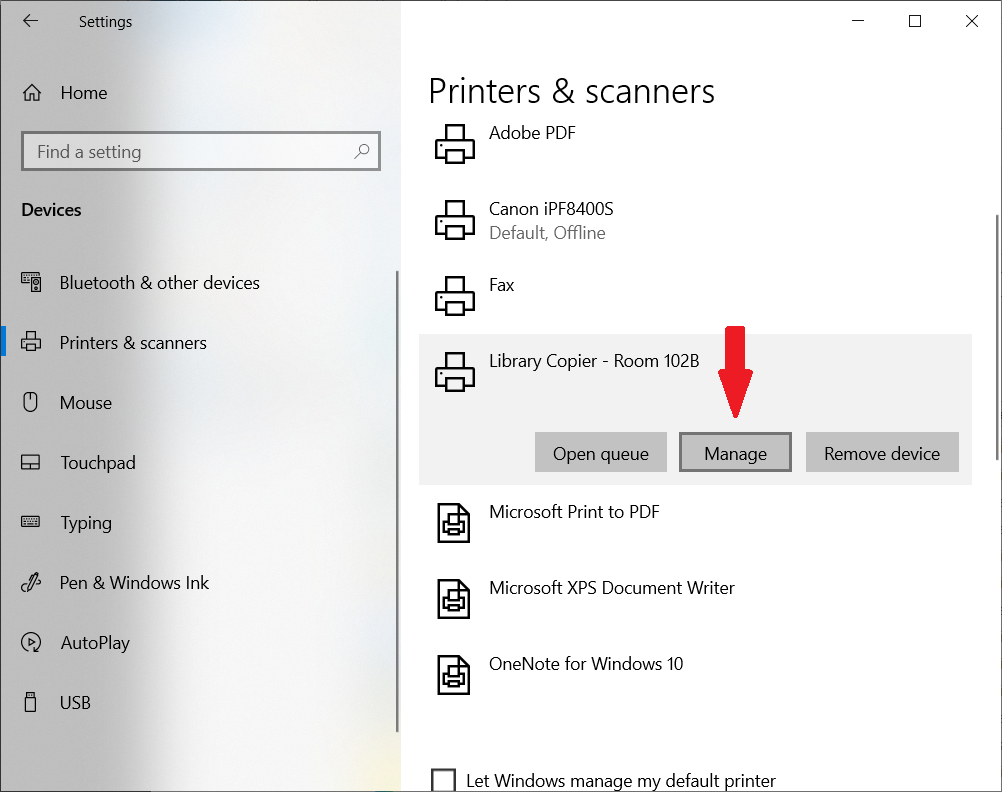](https://kb.mlml.sjsu.edu/uploads/images/gallery/2023-10/manage-print.png) - Click Printing preferences: [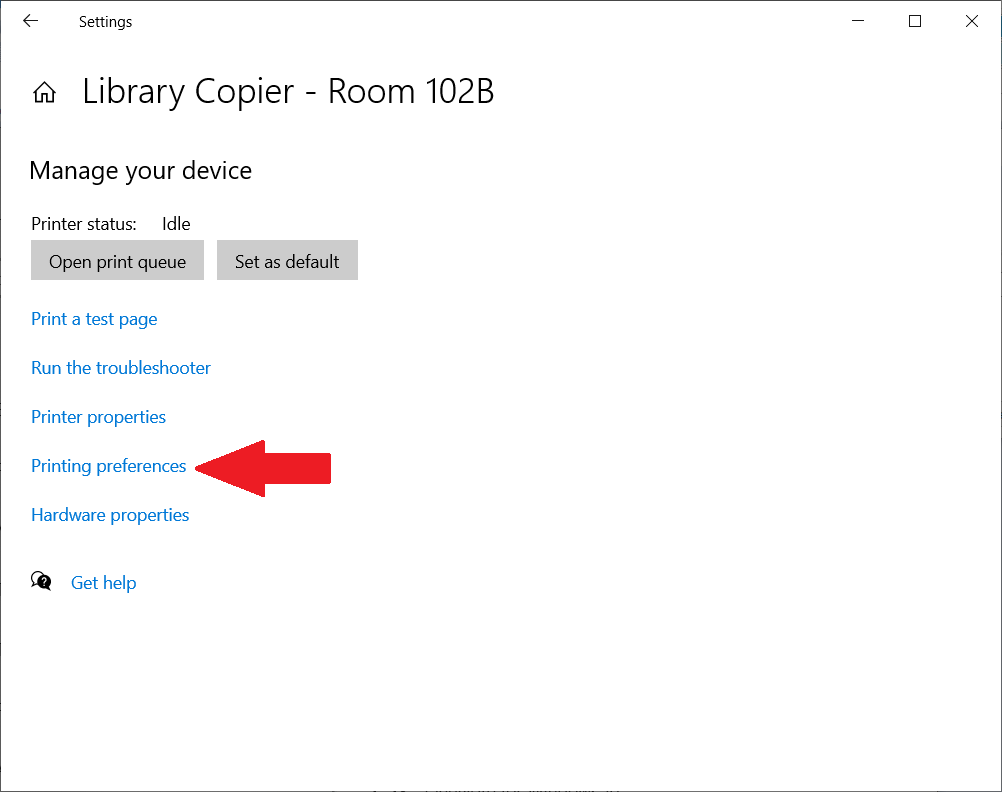](https://kb.mlml.sjsu.edu/uploads/images/gallery/2023-10/print-pref.png) - Select the “Favorite Setting” dropdown and click Gray Scale: [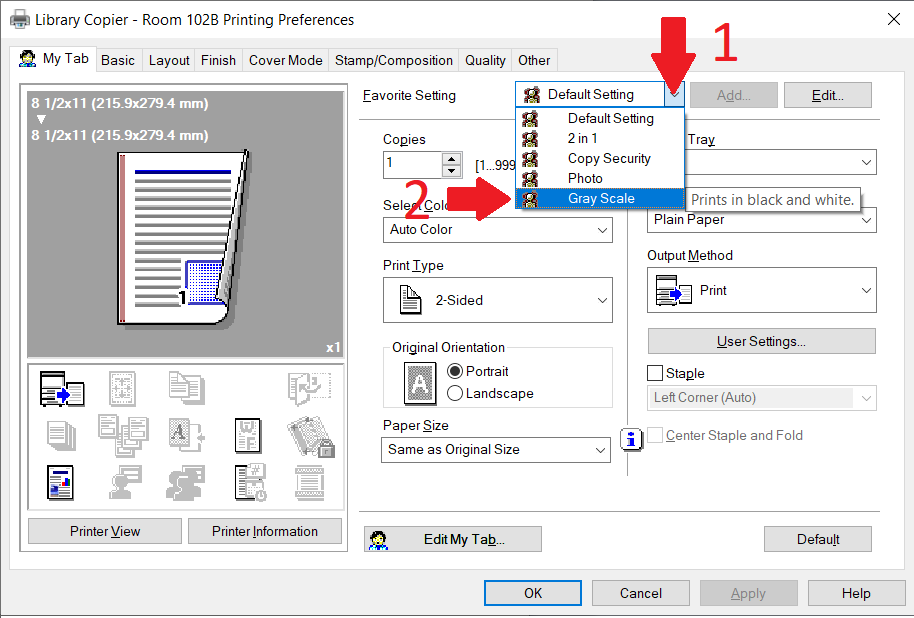](https://kb.mlml.sjsu.edu/uploads/images/gallery/2023-10/fav-setting.png) - Click OK. - This means that when you print, it will default to grayscale (black and white). If you need to print in color, you can select a color preset, but you should leave the default/favorite setting as grayscale. - If you need to change other printing settings, the Printing preferences menu is where you access them. Remember to leave the default set to grayscale. - The printer is now ready to be used.