Adobe
Information about Adobe Acrobat, the Adobe Creative Cloud package, and PDFs
- Adobe Creative Cloud Information & Installation
- Save a Document or Image as an Adobe PDF
- Convert a document to a fillable PDF form using Adobe Acrobat
- How to Fill PDFs Electronically Using Adobe Reader
- Adobe Acrobat
Adobe Creative Cloud Information & Installation
The Adobe Creative Cloud (CC) Package provides many creative editing tools for Windows and OS X, including Acrobat, Illustrator, Photoshop, Premiere, and more. Adobe CC is available to SJSU faculty, staff, and students at no cost for the entire duration of their affiliation with either institution.
System Requirements
Installation of Adobe CC requires 50 GB of free space on the hard drive (HD). Please make sure that your computer system meets the requirements and has sufficient HD space before beginning the installation. System requirements for Mac OSX and Windows may be found here.
Adobe Creative Cloud Access Form
Not sure if you already have access to Adobe Creative Cloud?
If you are a current San José State University (SJSU) student, faculty member, staff, or administrator, please complete the Adobe CC Access Form to verify your eligibility and request a personal Adobe account.
Need Adobe on a Campus Computer?
For installation on a university-owned device, please contact SJSU ITS Desktop Support rep for assistance.
Already Have Access?
If your Adobe Creative Cloud access has already been approved and you need help getting started, follow the steps outlined in the Adobe Installation Guide.
Troubleshooting
Adobe CC displays "You don't have access to manage apps" error when installing apps
- Sign out of the Creative Cloud Desktop app and close it
- Open File Explorer (windows) or Finder (mac) and navigate to the ServiceConfig.xml file:
- Windows: C:\Program Files (x86)\Common Files\Adobe\OOBE\Configs\ServiceConfig.xml
- MacOS: Macintosh HD/Library/Application Support/Adobe/OOBE/Configs/ServiceConfig.xml
- Copy ServiceConfig.xml to your desktop
- Open the copy of the ServiceConfig.xml file with Notepad (windows) or TextEdit (mac)
- Change the following line from
<panel><name>AppsPanel</name><visible>false</visible></panel>
to<panel><name>AppsPanel</name><visible>true</visible></panel>
- Save the copy of the ServiceConfig.xml file to your desktop
- Rename the original ServiceConfig.xml file in the Configs folder to ServiceConfig-old.xml
- Copy and paste the altered ServiceConfig.xml file from your desktop into the Configs folder
- Restart your computer
- You should now no longer receive the error message when installing new apps
Additionally, here are some video walkthroughs of the procedure described above:
- Windows: https://www.youtube.com/watch?v=FyphY4QJk44
- MacOS: https://www.youtube.com/watch?v=jr2jlngK4wU
Save a Document or Image as an Adobe PDF
Images
Windows
- Open the image you want to convert to a PDF
- Right click on the image and select "Convert to Adobe PDF"
- Save the new PDF to the location of your choice
Mac
- Open the image you want to convert to a PDF
- Click File > Export as PDF
- Save the PDF to the location of your choice
Word/Excel/PowerPoint Documents
Windows and Mac
- Open the word document you want to convert to a PDF
- Click File > Save As
- Select the location where you want to save the PDF
- Select "PDF" as the file type from the drop down
- Save the document
Convert a document to a fillable PDF form using Adobe Acrobat
This procedure has been verified on Adobe Acrobat 8 Professional:
(The procedure outlined should work with Acrobat v7, v8 and v9)
- Save the document as a PDF.
(Instructions for creating a PDF are located here: Save a Document or Image as PDF) - Open the document in Adobe Acrobat (Adobe Reader cannot edit PDFs).
- Navigate to the Forms menu.
- Select Run Form Field Recognition and allow the conversion to complete.
- Save the document as a PDF. (Choose a different file name to avoid overwriting your original document)
- Be sure to verify that all desired fields are fillable prior to distribution.
HINT: Use the "Highlight Fields" button or menu option to show which fields were automatically created. - If more fields need to be created, use the "Forms" toolbar. Open the Forms toolbar from: View > Toolbars or Tools > Forms > Show Forms Toolbar.
Once the fillable form has been created, users can fill the form using any standard PDF viewing application.
For Adobe Acrobat Pro DC:
- Save the document as a PDF.
(Instructions for creating a PDF are located here: Save a Document or Image as PDF) - Open the document in Adobe Acrobat (Adobe Reader cannot edit PDFs).
- Within Acrobat, click on the Tools tab and select Prepare Form.
- Select a file or scan a document. Acrobat analyzes your document and adds form fields automatically.
- Add new form fields from the top toolbar, and adjust the layout using tools in the right pane.
- Save your fillable PDF form and share it with others, or click Distribute to collect responses automatically.
More information about creating fillable PDFs is available on Adobe's website:
https://acrobat.adobe.com/us/en/acrobat ... eator.html
Also see our DocuSign FAQ to learn how to convert PDFs into fillable PDFs online.
How to Fill PDFs Electronically Using Adobe Reader
When having to fill out a PDF form, some forms can be filled electronically. If your PDF form is fillable, here’s how you fill it out and print the completed form. For more information, see Adobe’s Support Page on completing electronic forms.
- Make sure you have Adobe Reader installed on your computer.
- Faculty or staff members with a valid SJSUOne ID can use DocuSign to have recipients fill out and sign documents online. Refer to our DocuSign FAQs for more information.
- Download the fillable form onto your computer and open the file in Adobe Reader.
- To make form fields easier to identify, click the Highlight Existing Fields
 button on the document message bar, if necessary.
 - Select the Hand Tool.

- Select the fillable highlighted field on your form. An I-beam will appear for you to type in the text or arrow to select or check boxes.
- Fill in the necessary information for each field.
Example: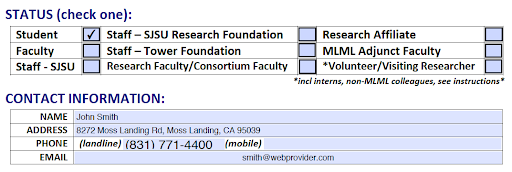
- Once you have finished filling the form, Save your form by printing as a PDF in order to email or print.
- Windows:
- Select File > Print.
- Choose Adobe PDF as the printer in the Print dialog box.
- Click Print. Type a name for your file, and click Save.
- MacOS:
- Select File > Save As.
- Select a location to save, type a name for your file, and click Save.
- To flatten your form so that it cannot be edited, open the file in the MacOS Preview application.
- Select File > Export As PDF...
- Select a location to save, type a name for your file, and click Save.
- Windows:
Adobe Acrobat
Adobe Acrobat is an application that allows you to connect with your documents, access essential PDF and e-signature tools, and make collaboration on PDF reviews easy from any device.
Here is a list of uses for the Adobe Acrobat DC app:
-
Create protected PDFs
- Prevent others from copying or editing sensitive information
-
Edit PDF text and images
- Fix a typo or swap an image in a PDF from your computer, iPad, or Android tablet
-
Convert creative filed and images to PDF
- Turn Adobe Photoshop, Illustrator, or InDesign files into PDFs
-
Simplify and speed up PDF reviews
- Collect group feedback in one PDF file online with no reviewer login required. Let reviewers see ea h other's feedback and clear up any confusion with @-mentions
-
Export PDFs to Office
- Convert PDFs to Word, Excel, or Powerpoint and keep the formatting
Getting started with Acrobat as an MLML student
Firstly, please visit our Adobe Creative Cloud Information and Installation page to get information on how to access and download Adobe applications for free through your student account
Second, to find out how to use the Acrobat DC app to design and edit your documents, take a look at the following tutorials from Adobe's website:
-
Getting started with Acrobat DC
- Use this webpage to learn the basics of Acrobat, including how to create a new PDF file, edit and comment on your PDF file, and add a password to protect your file from unwanted visitors
- How to create PDFs from text and image files
- How to customize your Acrobat toolbar
- How to combine files into one PDF
- How to create PDFs from Microsoft Office
- How to add annotations and sticky notes to your PDF
- How to extract pages from a PDF
- How to split a PDF file
- How to turn paper documents into searchable PDFs