Image Management, Search, & Usage
Image Management
Management Software
Mac OS Software:
Photos.app
Photos.app is an application included with macOS that you can use to store, organize, and search photos.
How to import photos:
How to create an album:
- Scroll down to “Create a new album” on Apple’s Organize and find your photos page.
How to add photos to an existing album:
- Scroll down to “Add to an existing album” on Apple’s Organize and find your photos page.
How to manage your albums:
- Scroll down to “Manage your albums” on Apple’s Organize and find your photos page.
How to label your photos:
- Select the following link to see hot to label your photos.
How to export your photos into a folder:
- Select the following link on exporting your photos.
OR
- Select your images and drag and drop them into a folder.
How to export your photos into Microsoft Word/Powerpoint:
- Click on the following link to learn how to export your photos into Microsoft Word/Powerpoint
Image Capture.app
Image Capture is an application program from Apple that enables users to upload pictures from digital cameras or scanners which are either connected directly to the computer or the network.
How to Import Photos from a Connected Phone or Camera:
- Click on the following link to learn how to import photos into Image Capture.
Windows Software:
Windows 8 & 10:
Microsoft Photos App
The Microsoft Photos app can be used to view, edit, and create albums with your images and videos.
How to import images:
- Check out Microsoft’s Guide to Importing Your Photos.
How to create an album:
- Click on the following link to learn how to create a new album.
How to tags to your images:
- Click on the following link to learn how to enter tags onto your images.
How to edit photos and videos:
- Click on the following link to learn how to edit your photos and videos.
How to export your photos into Microsoft Word/Powerpoint:
- How to insert images into Microsoft Word and Powerpoint. Check your Picture Folder if you are having trouble searching for where your images are stored.
How to save images in multiple folders:
- Select image
- Click the three dot on the top right → Save As
- Select folder you wish to save your image in and click Save.
Windows 7:
See the OneDrive KB Post.
Image Storage and Backup
Image Storage Strategies & Backup Best Practices
Backup Options and Locations:
Dropbox
Dropbox is a storage site for all kinds of files, including images. You can create folders and upload your images to them. There is no tagging options for Dropbox currently. We recommend changing the name of your images to search for them easily.
Google Photos
Google Photos is an online service that is similar to Google Drive. You can upload your photos, videos, animations, and movies onto Google Photos and store them into albums. You are also capable of adding a single image to multiple albums for organizational purposes (See our How to add a single image to multiple albums section). Google will auto-tag your images which you can use to find specific images (Also see our How to add your own tags section ). MLML students, staff, and faculty have unlimited storage space with Google (See G Suite for more information).
How to upload images:
- Select Upload.
- Select images and click Open.
- You have the option to upload your images as high quality at a reduced size or keep your images in its original resolution.
OR
- Drag and drop your images onto the screen.
OR
- Download the Backup and Sync application to automatically backup photos from your Mac or PC, phones, connected cameras, and SD cards.
How to import photos from Google Drive:
- Check out the following link to learn how to import your photos from Google Drive.
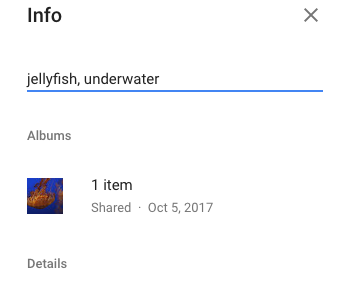
How to add your own tags:
- Select and open your image.
- Select the info icon in the upper right corner and add tags through ‘Add a description’.
You can now search through your images with those tags.
Example:
How to tag people or pets in your photos:
- Click on the following link to learn how to tag people/pets.
How to add location to photos:
- Click on the following link to learn how to edit the location of your photos.
How to create an album:
- Click on the following link to learn how to create albums.
How to add a single image to multiple albums:
- Scroll down to the “Add, upload, or remove photos and videos” section under “Change items in your album” on Google’s Support Page.
How to transfer your images from one account to another?
- If you have all of your personal photos linked to one account, but would like to separate them into another account here’s how you can change the ownership of those photos.
iCloud
iCloud is an iOS based cloud storage system that lets you store your photos, videos, documents, notes, contacts, and more. You can sync multiple Apple products together for easy access and automatic backup.
How to sync with Mac:
- Click on the following link to sync your Mac to iCloud.
How to sync with Windows:
- Click on the following link to sync your Windows to iCloud.
Other Options:
For more options, please see our OneDrive and Flickr KB Posts.
Backing Up Photos On Your Phone:
For computer backup, see our Computer Backup & Storage Page.
iOS
Syncing your iPhone/iPad to iCloud:
- Tap Settings.
- Tap on the Apple ID banner at the top of the screen.
- Make sure you’re using the same Apple ID as your other Apple products.
- Select iCloud.
- Tap Photos.
- Tap iCloud Photo Library to enable it.
- Enable Upload to My Photo Stream to to enable instant photo and video sync over Wi-Fi.
- To save memory on your iPhone by selecting Optimize Storage or Download and Keep Originals options.
- Optimize Storage will store your orginal photos onto iCloud, but keep low resolution versions of your photos on your iPhone.
Other options:
- You can always download other applications onto your phone to connect it online or with other products (See Backup Options and Locations).
Android
Syncing your phone to Google Photos:
- Make sure to download the Google Photos app, if needed.
- Open the app and sign into your Google Account.
- At the top, tap Menu.
- Select Settings and then Back up & sync.
- Tap "Back up & sync" on or off.
- Changing backup settings will affect all apps that use Back up & sync, such as Google Drive.
- If you have Back up & sync on, deleting the Google Photos app from your device will not turn it off. To turn off Back up & sync, follow the instructions above.
Syncing your phone to Google Drive:
- Open the Google Drive app.
- Tap Menu.
- Tap Backups.
- Tap on the backup you want to manage.
- If you are using multiple Google accounts, you can choose which account you want to upload your images to.
Other options:
- You can always download other applications onto your phone to connect it online or with other products (See Backup Options and Locations).
Image Search
Image Search Engines & RepositoryRepositories
MLML Digital Repository
MLML Digital Repository is a storage site where you can find images and videos that can be publicly or internally used. Search through events, local fauna, and field images taken by other MLML staff and faculty.
Lychee
The MLML Lychee image storage site is where you can access images taken by staff and faculty and use them for your own site.
AssetBank
Asset Bank is an image storage repository site where you can upload your images and share them with staff and faculty.
Google Image Search
Google Images is an image search engine to find images you might want to use for your own site. There is also a reverse image search function to search high resolution images of photos you are using.
NOTE: When using an image from another site, make sure you are giving proper credit and have permission to use that image (See MLML Image Use Guidelines). Also check out our G Suite Page to learn more about Google Suite.
How to reverse image search:
- Go onto Google Images and click on the camera icon in the search bar.
- Upload or enter the image URL and click Search by Image.
Tineye
Tineye is a reverse image search engine and is a great way to find the source and high resolutions of an image you wish to use, or use it to keep track of where your own personal images that are being posted online.
- Upload or enter the image URL and click on the search icon.
Google Image Search also now has reverse image search functionality: “search by image”.
Image Use
MLML Image Use Guidelines
Please see our Image Use Guidelines for more information on using and uploading images. Images must be used legally, according to their copyright and licensing.
Permit Guidelines
- Before adding any media from work completed under a permit, make sure there are no limitations to posting media within your permit agreement.
- If there are no limitations to the media you want to post then do the following:
- Display the permit number on the media where it is visible to viewers - using a textbox works well in photo editing applications
- Add the permit number in the “Description” section when uploading media into WordPress
- NOTE: It is important to determine if the media is appropriate for a public audience, or if it may be misinterpreted.
- Examples:

