Workstation Setup, Migration, & Management
Choose a Workstation
- Browse the configurations available and recommended by IT through SJSU
Backup Your Computer
Purchase an external hard drive to be used to backup your workstation (recommended 1-2 TB)This hard drive should be dedicated for this purpose onlyPrograms used to backup to a hard drive:Time Machine- AppleFile History(or equivalent) - PC
Operating System (OS) Configuration
Software Installation
-
To learn about software available through MLML and recommended software visit our Software Page
-
Software Installation Procedures can be found on our Knowledge Base
File Migration
-
To efficiently and seamlessly migrate files to your new computer use the following techniques:
-
Dropbox:
- Create folder(s) with all files that need to be migrated in your Dropbox on old computer
- Download Dropbox on new computer and sign in
- Copy all files and folders from old computer to new computer through Dropbox
-
Folder Sharing:
- Create folder(s) with files you'd like to migrate to new computer
- Right-click the folder you'd like to migrate
- Select Properties, a small window should pop-up
- Click the tab labeled "Sharing"
- Follow the instructions on this link to learn more about how to folder share
-
-
Helpful tips:
-
Create folders on each computer to keep track of things you will and will not migrate
- Name folders: “MIGRATED”, “DO NOT MIGRATE”, etc.
- Place folders on Desktop for easy access
-
Create folders on each computer to keep track of things you will and will not migrate
Backup Your Computer
There will be two forms of backing up that you will do for your computer:
1) Backup to Hard Drive
-
- Purchase an external hard drive to be used to backup your workstation (recommended 1-2 TB)
- This hard drive should be dedicated for this purpose only
-
Setup the following backup programs available on your device to backup to your external hard drive:
- Time Machine - Apple
- File History (or equivalent) - PC
2) Create a Disk Image
-
- Download Macrium Reflect
-
During installation:
- Do not include the PE environment
-
Reflect Defaults:
- Backup - set priority to 3/4
- Advanced - Disable backup notification
-
Once installation complete, configure backup settings:
- Open Macrium Reflect
-
Select "Create an image of the partition(s) required to backup and restore Windows" on the left side panel of Macrium
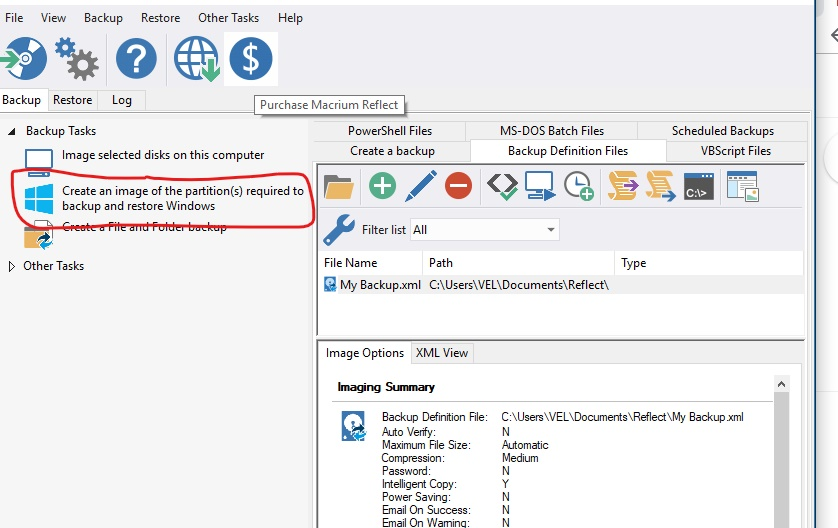
- Make sure the whole disk is selected (far left box is checked, as well as all sections of that disk are checked)
-
Set your destination of the images you create
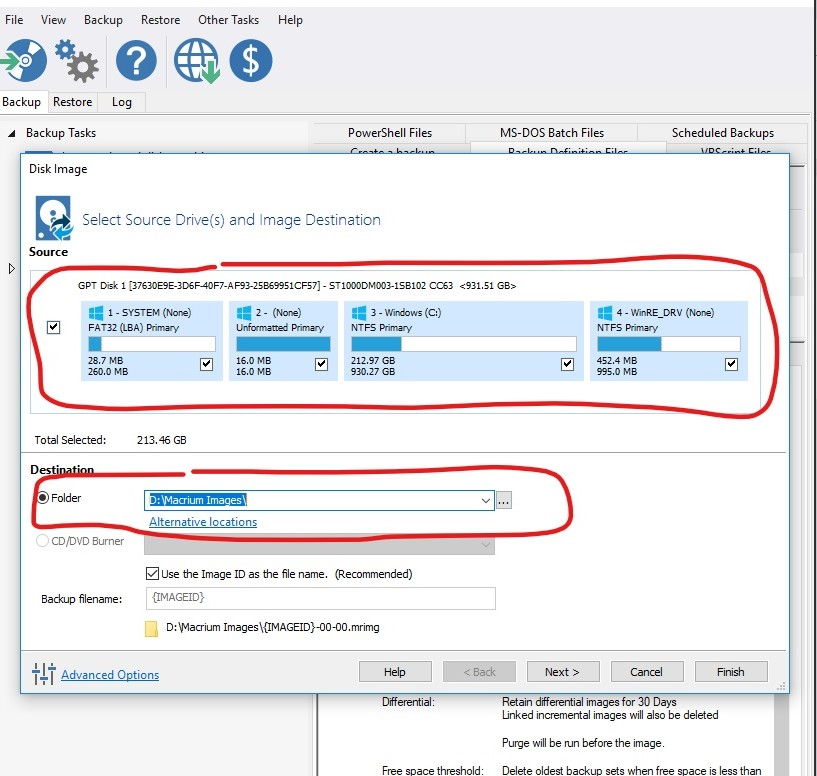
- Click Next
- Select a Template for your Backup Plan: Differential Backup Set
-
Select Edit Schedule with Full highlighted
- Configure settings:
- Monthly
- Every first Sunday at 3:00am
- Conditions: (check all mentioned)
- Run task as soon as possible after a scheduled start is missed
- Start the task only if the computer is on AC power
- Wake the computer to run this task
- Select OK
- Configure settings:
- Select Edit Schedule with Differential highlighted
- Configure settings:
- Daily
- Weekdays at 12:30pm
- Conditions: (check all mentioned)
- Run task as soon as possible after a scheduled start is missed
- Start the task only if the computer is on AC power
- Wake the computer to run this task
- Select OK
- Configure settings:
- Define Retention Rules
- Full: change amount to 2, change from "Weeks" to "Backups"
- Differential: change to 30 Days
- Hit Finish
- Hit OK
Management
-
To keep your workstation backed up and working properly it is important to properly manage the files and data on the computer
- Backups should be routinely scheduled - can automatically set this up in the backup computer settings (see Backup section above and follow link)